







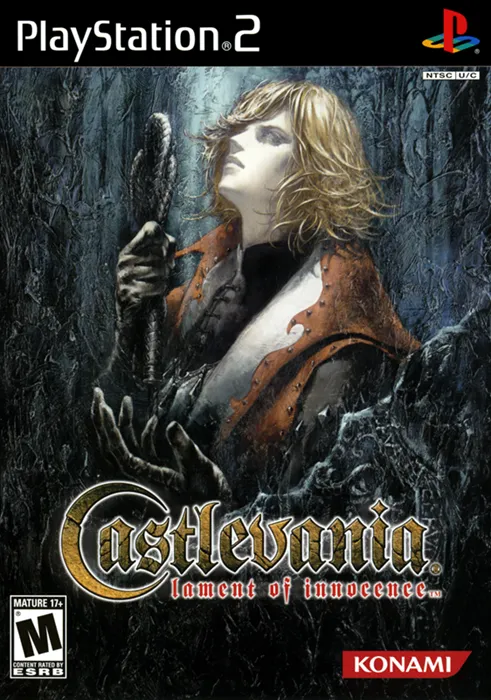
Here’s a general, spoiler-free guide for Castlevania: Lament of Innocence (LoI). I don’t cover everything; just stuff I thought people would particularly want to know on a first playthrough.
If you’d like me to go over anything not mentioned here, please leave a comment.
Attacking
Basic Attacks
When in doubt, start with normal attacks (default: square) and end with heavy attacks (default: triangle). The goal is to stun your enemy as soon as possible, giving your slow heavy attack animation the time it needs to play out.
If being counterattacked isn’t a concern, or you’re fighting an enemy immune to hit stun, it’s best to just spam heavy attacks. For most encounters, heavy attacks get the job done. The difference in damage inflicted is substantial, and your final attack in a combo sends many enemies flying, keeping you safe. Also, your generous defensive capabilities (see below) mitigate the risks of committing to heavy attacks.
Sub-Weapons
There are a ton of sub-weapons in this game. I won’t lie; I tested all of them, but I didn’t compare their DPS. I can’t tell you what the absolute best sub-weapons are, but I can tell you common traits I found useful.
In my experience, sub-weapon DPS pales in comparison to heavy attack combos. This is both due to the attacks’ damage itself, and the significant start-up animation for many sub-weapons. That’s a lot of time lost that could be spent attacking, which, combined with the inherent Heart cost of sub-weapons, is a big detriment.
I think, as a rule of thumb, sub-weapons that work independently of Leon (your character) are preferable. They should supplement your DPS, not be it entirely. For normal encounters, the default Crystal sub-weapon is quite useful. It can be set while moving, so it doesn’t cut into your attack time. When surrounded, which happens constantly, you can pursue a small section of your encirclement while covering your back and sides with Crystals, dealing extra damage while also keeping yourself safe. The Red Orb Crystal sub-weapon is the same thing, just stronger with a higher Heart cost.
These “set-and-forget” sub-weapons are what I found most helpful. For bosses, which often have times where they can’t be attacked, you can spare the time for start-up animations attached to any stronger “independent” sub-weapons you discover.
No sub-weapons are required for exploration.
Relics
Relics can be extremely difficult to find, and there aren’t many of them. If you don’t look up their locations, you probably won’t have a difficult time choosing between the few you have. Of the two starting relics, for instance, you can probably reason for yourself whether you need damage or defense. Obviously, Svarog Statue isn’t great for airborne enemies, so you’d use White Bishop, etc.
Recovering MP can be done by sitting in a room with an enemy capable of heavy attacks, usually larger enemy types, and holding R1. I won’t sugarcoat it: this is boring. If you’re emulating, hopefully you can fast-forward. If that’s not an option, maybe consider taping the button down while you get up for a few minutes.
A reliable way to charge MP is going left in the castle’s starting room, then opening the door on the right to refight the heavy-armor tutorial enemy. Just get your MP and leave. If you’re an attentive and diligent player, perhaps you’ll be fine just getting MP here and there from standard gameplay. In any case, topping off your MP before boss fights is a good idea, naturally.
Defense
Your defensive abilities are incredibly potent. Quicksteps (default: R1+X+left analog) grant you a lot of invincibility frames, possibly on the first input frame. Guarding (default: R1) nullifies damage and knockdown from nearly every attack. You might be surprised at just how many attacks guarding works against. There are many enemy types that literally can never hurt you, so long as you’re holding R1. Exploit these techniques, because you don’t need to be especially good at timing them.
Exploration
Quick Travel
There are no warp rooms like in most Castlevania adventure games. To get around expediently, I’d recommend clever use of Magical Tickets and Memorial Tickets. They teleport you to the shop and your last used save point, respectively.
Sometimes, backtracking to an area is faster by using a Magical Ticket and starting from the area’s entrance. But by using the Tickets in conjunction, you can do even more. You could, for example, save right before a boss, Magical Ticket away to buy items, then use a Memorial Ticket to get back to the save room before the boss. Keeping an eye out for these uses can save a ton of time.
Tickets are expensive, but you can obtain a surplus of Gold from using my strategies further down.
Gold & the Shop
There aren’t many equipment items or other one-time purchases in the shop, so most of your Gold should go towards consumables like Potions. Still, acquiring Gold in LoI can be very time-consuming. I think farming Gold from candles is pretty much a waste of effort.
Instead, your best source of Gold is actually from enemies. Other than bosses, enemies are guaranteed to drop Gold upon death. Think of it as a replacement for experience points, since LoI has no leveling system. Even common enemies can drop $25—25 times the amount you get from nearly any candle.
Gold drops correlate with an enemy’s strength. The more difficult or rarer an enemy type is, the more Gold it’s likely to drop. Some enemies can drop up to $400, but drops of that size aren’t guaranteed. Guaranteed drops seem to top out at $100.
What really matters, though, are drops of $1000 or greater. If an enemy is capable of dropping these, it’s actually logged in the Encyclopedia, unlike standard Gold drops. Keep an eye out for enemies carrying big money bags, because you might be surprised at where they can be found.
My Gold Farming Method(s)
In case a reader enjoys coming up with their own strategies, I’ve spoiler-tagged this section.
My Gold Farming Method(s) (click to reveal)
Raise your Lck (Luck) stat as much as possible, then slaughter Skeleton Archers by the dozen. Skeleton Archers can drop $1000 bags, and they’re very easy to kill. Far as I could tell, they are the most efficient way to grind Gold. There are larger bag quantities, but they’re attached to enemies that take longer to kill and appear in smaller numbers, so I don’t think it’s worth it.
There’s many rooms where Skeleton Archers appear in bulk, so I don’t have a particularly good spot. If you raise your Lck high enough, however, you might never need to seek out a specific spot for farming Gold. More on that soon…
The Lck (Luck) Stat
Your Lck stat in LoI is extremely important when it comes to your success. Having it raised high enough can trivialize the game. Obviously, the passive benefit of being more likely to encounter rare enemy drops like equipment items is good enough on its own, but the real advantage is the difference in Gold drops. I believe higher Lck causes enemies to drop higher values of Gold on occasion. What might be a $100 bag becomes $400, which adds up fast. Other than when fighting bosses, I think your equipment in LoI should prioritize Lck at all times. No Defense boost is as helpful as being able to buy nine High Potions.
Lck can only be increased through equipment, and there are two items capable of doing so. One of them, the Raccoon Charm, is extremely well-hidden, while the Coin of Happiness is a little more accessible. These effects can stack for a maximum Lck stat of 45.
Here are their locations, hidden for anyone avoiding spoilers.
Raccoon Charm location hint
Dark Palace of Waterfalls
Second hint
Room with the guillotines on B1
Full location
In the middle of the room, there’s a ledge on your right side you can jump to. After that, jump to the other side by grappling a floating pole with your whip.
Coin of Happiness full location
Randomly drops from the Hanged Man enemy.
Area Hints
House of Sacred Remains
Esoteric secret
- There’s a bookshelf with a secret passageway behind it.
Garden Forgotten by Time
Esoteric secret
- You can stand on the giant plant enemies when their bud opens up.
Dark Palace of Waterfalls
Rail coaster secret
- The automatic coaster/rail sections’ coin pattern alternates. Each one starts on the right side, then the next coins are on the left, then on the right, etc. If all coins are obtained, a reward appears in the center and must be grabbed quickly. If you miss, you have to do it all again.
Anti-Soul Mysteries Lab
Esoteric secret
- There’s a special floor panel you can stand on to teleport to another location.
Ghostly Theatre
I got nothin’. I felt this area was relatively straightforward.
Pagoda of the Misty Moon
Esoteric secret
- There is a secret room with an important key item. I’m not referring to the Dragon Crest.
Leave a Reply