








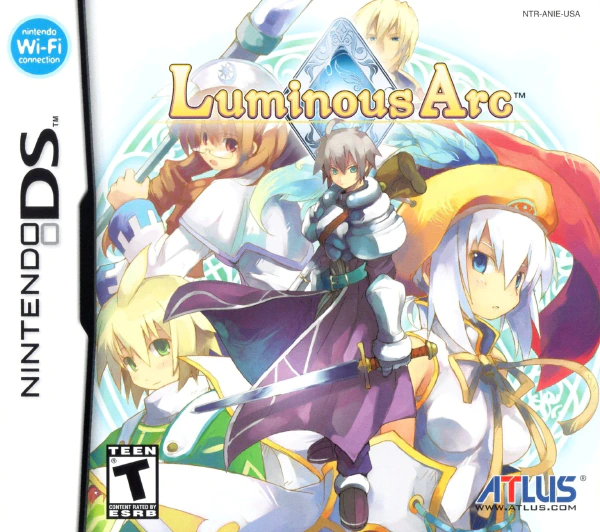
I noticed it was difficult to find specific, accurate, spoiler-free information on Luminous Arc, so this guide is my attempt to remedy that. If you source this guide, please provide a link back to it!
If I’ve made any mistakes, I’d greatly appreciate you leaving a comment at the bottom of the page.
More information is added as I feel like it, but if you would like something new covered, please leave a comment.
General Advice & Strategies
Click to reveal section.
Leveling up fully restores HP and MP. Exploit this!
This mechanic is one of the most powerful at your disposal in Luminous Arc. By timing when your character levels up you can frequently, fully heal them. Doing this efficiently can trivialize MP management. It can also save you turns spent healing your characters. I can’t overstate just how huge of an advantage this is, and it can enable you to defeat enemies that are stronger than your own units.
Constantly gain EXP by taking redundant actions.
Compounding with the above tip, you can keep your levels high by taking unnecessary support actions when there are no enemies in reach. Support actions like healing, buffing, etc. only reward 5 EXP when used on yourself, but adding another unit (even an enemy) changes that to a whopping 30 EXP. Because your MP is restored upon leveling up, you can essentially only benefit from taking “pointless” actions that accrue EXP. Never waste a turn!
EXP does not roll over past 99. New levels always start with 0 EXP.
Simple as. If you have 99 EXP and earn anything above 1 EXP, that EXP is lost. I wouldn’t agonize too much over this, as EXP is plentiful in Luminous Arc, but since healing off of levels can be strategically beneficial, it can help to distribute big EXP gains evenly. Remember, low-level characters earn more EXP from attacking enemies of a higher level, with the gained EXP being greater with a larger level gap. There is a cap on how much “bonus” EXP can be gained per action from a level gap, but I don’t recall exactly where it stops.
Double-check targets and range using the L and R buttons.
The way Luminous Arc communicates in-range targets is somewhat unintuitive. Range is relative to the acting unit’s position, not to the epicenter of their effect. For example, if you cast an AoE spell in a cross pattern, you might logically expect the center to calculate the spell’s range, as that’s where the spell forms. But this isn’t the case. If you put a spell’s center on a high elevation, it will still miss any overlapped targets on too high of an elevation.
This can happen when the outside range of a spell overlaps with a target within your allowed elevation, but the center is on higher, incompatible elevation. Don’t mistakenly assume the higher elevation will land simply because units are within the target pattern.
That may sound confusing, especially if you haven’t experienced the situation I’m describing. In any case, all you need to remember is to verify affected targets. After confirming your action, you can confirm again to initiate it, but you can also use L and R to cycle through every affected target. Not seeing any units you expected? Then your action won’t affect them, so consider backing out and trying something else.
Flash Drives can be used for more than just higher damage.
That’s certainly their main benefit, but Flash Drives have their own properties and can offer unique advantages relative to the rest of a character’s Skills and Magic: range, AoE, added effects, etc. If a Skill or Magic technique doesn’t reach an enemy, try Flash Drives and vice versa.
Status effects aren’t… entirely useless.
If you reflexively assume status effects won’t be useful, you’re mostly correct. Even putting their individual effects aside, status effects tend to have low hit rates. If you use a technique that only inflicts status and miss, you just wasted a turn, which is extremely bad.
That said, you can raise those hit rates, because they’re influenced by TEC. Yes, this normally irrelevant stat actually has a function. Chance of inflicting status is calculated weighing the attacker’s TEC against the target’s RES. The larger the gap, the more likely it is to inflict ailments. Characters capable of inflicting status can equip TEC-boosting items to improve accuracy. Naturally, this comes at the cost of improving their general offensive stats.
Is that worth it? Well, some late-game enemies get beefy enough to stick around maps for a while, and each of their attacks can deal large damage. I personally had success using high-impact statuses like Charm to neutralize them, so consider using status effects.
Think Three Steps Ahead When Positioning
If you recall the tutorial, a unit’s directional facing determines how some damage is calculated. Physical damage receives an increase in both accuracy and power when attacking a unit’s side, and that bonus rises further when attacking their backside. That advantage is compounded with an elevation advantage; an attacker on higher ground performs better against a unit on lower ground. Magic is entirely unaffected by these positional modifiers.
Naturally, you generally want to change facing to avoid enemies attacking your sides, if possible. That’s simple enough. However, if taking a hit from the side is unavoidable, consider positioning yourself so that your back is facing nearby party members. Enemy AI has a massive bias towards attacking from the side, so by doing this, you can manipulate where enemies move and put them in the immediate attack range of other party members.
Inventory Management: Rules & Quirks
Click to reveal section.
- There is a hard cap to the maximum number of items you can hold in each category (Weapon/Headgear/Armor/Consumables). I’m not certain what that number is, but you’ll receive a warning after map completion notifying you of a full inventory. Basically, don’t hold onto every piece of Equipment you find. You’ll never be able to have a complete set.
- You can’t view your Vitae inventory outside of the Workshop (unlocked as the story progresses).
- You can’t view your Equipment inventory outside of the Equipment menu, and you can’t view your Equipment quantity outside of a Shop (via selling) or the Workshop (via Imbuing).
- You can’t auto-sort any Inventory. Vitae are uniquely auto-sorted by default.
- You can’t unequip anything. You can only swap Equipment out for other Equipment. This generally doesn’t matter, but can be annoying early on regarding Accessories, since you won’t have many.
World Map: Explanation & Exploits
Click to reveal section.
The overworld is connected via a series of nodes with two types: explorable regions and battle spaces (represented by an icon of two crossing swords). Explorable areas can contain NPCs to talk to, shops, and an option to progress the storyline. Some of these areas are remnants of previously-required story battles, and in those cases, there may not be anything to do other than select “return to world map.”
While it may not appear so, every battle space is optional. There’s a chance that crossing a battle space spawns a prompt asking if you’d like to fight or not. Naturally, refusing allows you to continue onward.
This prompt seems to occur at random, but I’m suspicious that whatever internal value is used to check whether to display the prompt is easily manipulated. In my experience, loading a save right after booting the game almost always results in being able to skip the next world map battle. It’s therefore possible to skip all of these by continuously saving and rebooting the game. It’s a tedious process, but compare it to the time it takes to actually complete these battles; especially battles where you have little to gain due to battling early, under-leveled enemies. If rebooting the game isn’t letting you skip a battle, try exiting that “screen” of the world map, saving, then rebooting again.
It’s possible to load a save file from the world map menu, which can save you time as Luminous Arc has no soft-reset function, but if my recollection is correct, doing it this way doesn’t guarantee skipping a battle. I think completely rebooting the game causes the memory to flush whatever value is checked for world map battles, and that value always defaults to whatever enables skipping. Let me know if you find a more optimized method!
All that said, I wouldn’t advise skipping every random battle. You may want to use the above exploit sometimes for sanity’s sake, because it seems that resetting the relevant value after starting the game is very difficult—you’ll be drawn into nearly every world map battle.
I think most players are best off completing every battle along the required route for the first time, then just skipping them when backtracking for whatever reason. While it’s easy to get EXP in Luminous Arc, you still want other resources like Rico (money), and without some optional battles, you’ll fall behind. Remember that the game developers likely didn’t balance anything with the expectation that you’d only complete required battles.
Lastly, shortcuts open up on the world map after certain points of progress. The final shortcut is unlocked shortly before the last battle. Some side quests have a limited timeframe to complete them, so don’t wait until all shortcuts unlock if you’re interested in doing those. You never unlock a way to warp around the world map, unfortunately.
Intermissions: Explanation & Tips
Click to reveal section.
Shortly after starting the game, upon completing maps, you’ll attain the ability to converse with any participating party member. In these Intermission sequences, you can only select one party member per victory. Party members don’t need to survive the map to be selectable; they merely need to have been present. Two-parter battles won’t allow you to select a party member until the second half of the map is complete.
Each party member has ten Intermission conversations that progress in a linear order and present you with one dialogue choice. Of the three options, one greatly improves your relationship with that party member, another mildly increases your bond, and the worst option doesn’t advance it at all. You have to guess at what each party member would like to hear based on context and their personality.
Your relationship progress is measured by a heart outline that fills up as you select positive responses. After all ten Intermissions have been seen, you no longer have a way to improve that relationship. Attempting to speak to that party member will have them recommend you speak to someone else, and you’ll waste your Intermission opportunity for that battle.
A maxed-out relationship is represented by a blue heart with an arrow through it. A blue heart with no arrow means you’ve seen all Intermissions, but didn’t pick enough optimal responses. A red heart with an arrow means you’ve achieved the maximum amount of relationship points, but still haven’t seen all Intermission scenes, thus you should continue talking to that party member.
Upon certain point thresholds, satisfied party members will give you items, which increase in value as you raise your relationship. Rewards typically begin as consumable items, then progress into rare Gems and equipment. Some rewards are very difficult to obtain extra copies of. Rewards depend on the character giving them, and they’re always the same. Lastly, there is no relationship “decay” mechanic. Your relationship points can never decrease.
If you fail to max out a relationship in your ten allotted Intermissions, you’ll have another chance upon completing the game and starting a New Game+. Your relationship progress carries over, but Intermission conversations reset from the beginning, giving you another ten chances to get points.
There is one exception to this.
Some party members have CGs during their final Intermission, which are viewable if you complete their Intermissions with the heart gauge at least half-full. Seen CGs can be viewed in a gallery via the main menu’s Extras option upon finishing the game.
Cecille uniquely has a CG that’s only available for part of the game, and it purportedly cannot be obtained once missed even on a new game+. Therefore, if you care about 100% completion on your save file, you should prioritize completing Cecille’s Intermissions immediately. Not getting this CG means that it’ll forever be marked with a question mark in your gallery.
Grinding Intermissions
If you want to view all Intermissions, you’ll inevitably have to grind. Therefore, a map that can be completed quickly is preferable.
The best map I’ve found for this is Leastre Bridge. Have a party member with a 4×4 diamond-shaped AoE spell (preferably Vivi, as she has the highest MOVE). Save beforehand, then enter the map with your magic user and whichever party member you want to build relationship points with. Bringing a larger party will slow you down as you’re passing everyone’s turns. Alph doesn’t need to be present to view Intermissions.
Simply have your passive character select “wait” while your offensive character attacks with their AoE magic. Enemies on this map commonly clump into groups of three or four, and their levels are low enough to where you can eventually defeat them in a single attack.
Side Quests: Explanation
Click to reveal section.
Luminous Arc has a few side quests and associated optional battles. These can only be found and initiated by viewing certain dialogue in specific areas after reaching the requisite chapter. Some are time-sensitive, meaning you can no longer complete them if you progress too far into the story.
These side quests are entirely superfluous, gameplay-wise. They offer no unique rewards (if any rewards), and the only thing you gain from them besides EXP is character development and worldbuilding. Some of it is humorous, some of it is interesting background info, etc. It’s up to you if you care about such things. There’s also nothing tracking side quest completion other than the initial dialogue trigger disappearing following the quest’s completion or time expiration.
Side quest progress resets on a New Game+. Cecille’s side quest, despite its time-sensitive nature, can be completed every playthrough, unlike her permanently missable Intermission CG.
Side quest battles can be difficult relative to when they become available. The minimum enemy levels are somewhere around 40. For perspective, endgame player levels should be around 50. For side quests that never expire, putting their battles off until you’re an appropriate level is no problem.
The same can’t be said for certain time-sensitive quests, and the worst of these is naturally the side quest that expires the quickest. This is Cecille’s quest, which pits you up against high-level opponents with only two party members. You can absolutely beat it on a first playthrough without grinding, but it will require some finagling.
Strategy for Cecille’s Quest (Click to reveal)
At the bottom left of the map, there’s a small alcove you can position yourself in so that enemies can usually only hit you once per turn. Make a beeline for it and stay there. This map heavily involves exploiting full heals after leveling up. Since you’re likely under-leveled, hitting enemies should reward 24-30 EXP. Strategically pace your attacks and healing with consumables so that level ups occur when you’re near death.
Cecille will likely die early on, but she’s not necessary to win the map. Alph’s Flash Drives are extremely helpful, as they can paralyze enemies and earn you some free turns. Save Flash Drives for desperate situations where you can’t heal enough to survive the next turn. Equip Alph and Cecille with HP-boosting Accessories. If you can take enough hits, raising TECH is also an option to improve the odds of your FDs inflicting status.
Remember that when you kill an enemy, another will immediately take its place to attack. Sometimes, enemies will attack, move, and allow a different enemy to attack, which is extremely dangerous. I wish I had better advice here, but I couldn’t find any pattern to the AI suddenly wising up and doing this. They generally don’t, but routinely make suspend saves just to make sure. Lastly, be aware that the beetle enemy has a two-range, piercing attack.
Imbue / Imbuing (The Workshop)
Click to reveal section.
After a certain, nonoptional point in the story, you’ll unlock the ability to customize and forge Equipment using the Vitae collected from battles and Intermissions. Vitae are the items with strange, short names you typically see following a map’s completion. You can’t see your on-hand Vitae outside of the Workshop.
You can only use Imbue and its associated functions at the Workshop, which there’s only one of in the game. Yes, you will need to crawl all the way back there whenever you want to Imbue. Refer to the world map section of this guide for tips on avoiding random battles.
To see a Vitae’s properties, they must be Appraised. The amount of Rico spent determines how many of a Vitae’s attribute categories are revealed. For instance, if you only spend 500 Rico, only one category will be revealed. Spending 2000 Rico unveils all three Vitae attributes. While the Vitae you receive from battles are random, a Vitae type’s associated attributes are always the same. The Workshop tracks which types of Vitae you’ve Appraised, so after finding and Appraising every Vitae type, you’ll no longer need to use Appraise.
You’re probably wondering to what degree you’re expected to “naturally” use Imbuing. Speaking personally, I completed the entire game without ever touching Imbue, so that should speak to how essential it is. I did look up combinations for unique Equipment on a New Game+, however.
The final two battles of Luminous Arc are particularly difficult, and optimal equipment would certainly help, but they’re not necessary (and neither is grinding). Decide for yourself how much Imbuing feels appropriate and what’s “fair” to reference guides for.
Imbuing Rules
Click to reveal section.
- Only Weapons, Armor, and Accessories can be Imbued. Headgear cannot be Imbued.
- Accessories cannot receive normal stat-altering Imbuements. They can only be used in the creation of new Accessories, which will always have the same, default statistics. For instance, you can’t slap an extra stat bonus on a stat-boosting Accessory.
- When Imbuing, there are three possible outcomes:
- An incompatible combination of Apprentice/Equipment/Vitae results in no new Equipment and all materials being returned to you. You can’t suffer a net loss from Imbuing.
- A normal, compatible combination of Apprentice/Equipment/Vitae applies an Element and stat bonus to the chosen Equipment. The resulting Element and stat bonus are exclusively determined by the chosen Vitae.
- A specific, predetermined combination of Apprentice/Equipment/Vitae results in new Equipment with fixed stats (Vitae effects aren’t applied). Weapons and Armor created this way are always unique and can’t be purchased from Shops. New Accessories can be generic/purchasable, but many are also unique. Much of the best Equipment in the game is obtained via this method.
- Alice and Therese’s dialogue upon selecting them contains hints to the Weapons/Armor and Vitae required for unique Equipment. They are essentially riddles. You do not need to have ever viewed, or be actively viewing, the relevant dialogue for your desired Equipment. Correct combinations always work.
- Choosing Alice or Therese only matters in regards to creating new Equipment.
- If you don’t want new Equipment, you should use the opposite of the required vendor. If the Equipment and Vitae are otherwise compatible, you’ll receive normal, modified Equipment instead of new Equipment.
- Two Vitae must be used in every Imbuement.
- The first Vitae chosen will only determine the output’s Element. The resulting Element is the selection list’s subsequent Element. If a Fire Vitae is selected first, the output Weapon or Armor will carry the Water Element, because Water Vitae are listed after Fire Vitae. This order loops around, with Neutral Vitae resulting in a Fire Element.
- The rarity/power/stats of the first Vitae doesn’t influence the output Equipment, so the first Vitae should always be a common one you have many copies of.
- The second Vitae applies its effect to the output Equipment. This is straightforward. If you apply a Vitae with the effect of ATK+15, the Equipment will receive an additional 15 ATK. To reiterate, this means you can’t “stack” stat boosts; you only get one boost, one time.
- When creating unique Equipment, only the correct Vitae names are what matter, since unique Equipment has fixed stats. The Vitae order is irrelevant.
- The first Vitae chosen will only determine the output’s Element. The resulting Element is the selection list’s subsequent Element. If a Fire Vitae is selected first, the output Weapon or Armor will carry the Water Element, because Water Vitae are listed after Fire Vitae. This order loops around, with Neutral Vitae resulting in a Fire Element.
- Equipment can only be Imbued once. You will need a new piece of that Equipment if you want a different Imbuement.
- Unique Equipment created through Imbuing cannot be Imbued. Their statistics are completely fixed and forever unchangeable.
Imbuing Recipes
Here are tables containing every recipe for Imbuing that I could find. Click one of the column headers to sort as you desire. Let me know of any errors or missing recipes.
Weapon Recipes
| Name | Type | Apprentice | Base Equipment | Vitae | Vitae | HP | MP | ATK | GRD | SPD | TEC | MAG | RES | Element | Effect | Notes |
|---|---|---|---|---|---|---|---|---|---|---|---|---|---|---|---|---|
| Airblade | Sword | Alice | Sabre | Sad | Song | 0 | 0 | 80 | 0 | 25 | 0 | 0 | 0 | Wind | ||
| Defender | Sword | Therese | Estoc | Wall | Pierce | 0 | 0 | 110 | 25 | 0 | 0 | 0 | 0 | Neutral | ||
| ElecEdge | Sword | Therese | Urumi | Thunder | Anger | 0 | 50 | 115 | 0 | 0 | 0 | 0 | 25 | Thunder | ||
| Midgard | Sword | Therese | LapisSwd | Fallen | Dragon | 20 | 20 | 170 | 20 | 20 | 0 | 20 | Neutral | |||
| Gaia Bow | Bow | Alice | BrassBow | Bird | Kill | 0 | 0 | 125 | 0 | 0 | 25 | 0 | 0 | Earth | ||
| Gale Bow | Bow | Alice | SteelBow | Cloud | Soul | 0 | 0 | 135 | 0 | 25 | 0 | 0 | 0 | Wind | ||
| Orion | Bow | Therese | LadyHawk | Dragon | Guardian | 0 | 0 | 0 | 0 | 0 | 0 | 0 | 0 | Neutral | Same weapon as “DragonEye.” “Rym” is the Dragon Vitae’s name before Appraisal. | |
| Dead End | Great Sword | Alice | Changdao | Hot | Romance | 0 | 0 | 15 | 0 | 0 | 0 | 0 | 0 | Neutral | Instant Death | |
| Soulbane | Great Sword | Therese | Manabld | Warrior | Heart | 0 | 100 | 120 | 0 | 0 | 0 | 0 | 0 | Neutral | ||
| Yggdra Sword | Great Sword | Alice | BroadSwd | Century | Tree | 0 | 0 | 130 | 0 | 0 | 0 | 25 | 0 | Earth | Sleep | |
| Brionac | Spear | Alice | Fine Spr | Sad | Warrior | 0 | 0 | 170 | 0 | 0 | 0 | 80 | 0 | Thunder | ||
| Wahrheit | Spear | Therese | Ranseur | Anger | Guts | 0 | 0 | 150 | 0 | 0 | 0 | 100 | 0 | Neutral | ||
| Cosmos | Rod | Therese | RuneRod | Hope | Sun | 0 | 50 | 140 | 0 | 0 | 0 | 150 | 0 | Light | ||
| SolarRod | Rod | Therese | MapleRod | Kill | Light | 0 | 0 | 95 | 0 | 40 | 0 | 130 | 0 | Light | ||
| Kamikaze | Kunai | Alice | Chizuru | Pierce | Cloud | 0 | 0 | 130 | 0 | 0 | 0 | 0 | 0 | Wind | ||
| Shisui | Kunai | Therese | Mizudori | Black | Snow | 0 | 0 | 120 | 0 | 0 | 0 | 0 | 0 | Water | ||
| Corona | Crossbow | Therese | Hawk Eye | Romance | Eternal | 0 | 0 | 120 | 0 | 0 | 25 | 0 | 0 | Earth | ||
| Eclipse | Crossbow | Alice | EagleEye | Counter | Poet | 0 | 0 | 145 | 0 | 0 | 0 | 0 | 0 | Dark | ||
| Aeolus | Lamp | Alice | GoldLamp | Heaven | Light | 0 | 0 | 120 | 0 | 0 | 0 | 115 | 0 | Wind | ||
| Ifrit | Lamp | Therese | SilvLamp | Flame | Hell | 0 | 0 | 75 | 0 | 0 | 0 | 200 | 0 | Fire | ||
| Foliator | Lily | Therese | Lily Pad | Love | Soul | 0 | 0 | 140 | 0 | 0 | 0 | 140 | 0 | Light | ||
| SnowDrop | Lily | Alice | Ivy Leaf | Water | Snow | 0 | 0 | 100 | 0 | 0 | 0 | 200 | 0 | Water | ||
| Gaia Fist | Fist | Alice | Sphairai | Earth | Beast | 0 | 0 | 150 | 0 | 0 | 0 | 65 | 0 | Earth | ||
| Death Book | Book | Alice | Sagebook | Dark | Shidoshi | 0 | 0 | 160 | 0 | 0 | 0 | 120 | 0 | Dark | ||
| Grimoire | Book | Alice | RuneBook | Lonely | Century | 0 | 0 | 60 | 0 | 0 | 0 | 235 | 0 | Light | ||
| Vajra | Knife | Therese | Pugio | World | Sea | 0 | 0 | 145 | 0 | 0 | 0 | 0 | 0 | Thunder | ||
| Dolphin | Knife | Therese | Dagger | Hot | Beast | 0 | 0 | 120 | 0 | 0 | 0 | 0 | 0 | Water | ||
| AxelHorn | Horn | Alice | Phantom | Hell | Goddess | 0 | 0 | 130 | 0 | 0 | 0 | 180 | 0 | Neutral | ||
| Twilight | Horn | Alice | ShortSta | Quiet | Lonely | 0 | 0 | 65 | 0 | 0 | 0 | 95 | 0 | Dark | Only creatable after clearing Chapter 18. | |
| Murasame | Katana | Alice | Izayoi | Moon | Kill | 0 | 0 | 160 | 0 | 0 | 0 | 0 | 0 | Water | ||
| Yukibana | Katana | Alice | Yukikage | Flow | Wind | 0 | 0 | 140 | 0 | 25 | 25 | 25 | 0 | Neutral | ||
| Phoenix | Scythe | Therese | DeathScy | Flame | Bird | 0 | 100 | 120 | 0 | 0 | 0 | 100 | 0 | Fire | ||
| SolarScy | Scythe | Therese | DemonScy | Fallen | World | 0 | 0 | 160 | 0 | 0 | 0 | 0 | 0 | Fire |
Orion (Bow): [Therese] LadyHawk + Dragon + Guardian
The reason I started this section. This weapon is sometimes referred to as DragonEye, which might be its Japanese name. Also, “Dragon” is the Appraised name of the “Rym” Vitae, the latter of which has been listed as part of the recipe. They’re exactly the same. The recipe will work regardless of whether the Vitae is Appraised or not.
Armor Recipes
- No Armor has an effect on Attack or Magic, so those columns are absent.
- No Armor has additional effects (not counting its Element), so that column is also absent.
| Name | Type | Apprentice | Base Equipment | Vitae | Vitae | HP | MP | GRD | SPD | TEC | RES | Element | Notes |
|---|---|---|---|---|---|---|---|---|---|---|---|---|---|
| Balbadia | Alice | HvyPlate | Wall | Century | 0 | 0 | 150 | 0 | 0 | 0 | Neutral | ||
| Mnta Mail | Alice | GrndMail | Heaven | Hell | 0 | 150 | 120 | 0 | 0 | 0 | Neutral | ||
| Kamisimo | Alice | BlueDogi | Sky | Cloud | 0 | 0 | 110 | 0 | 0 | 0 | Wind | ||
| Swan Suit | Alice | Suit | Bird | Romance | 0 | 0 | 100 | 0 | 0 | 0 | Water | ||
| Wind Mail | Alice | LumnMail | Snow | Wind | 0 | 0 | 130 | 0 | 0 | 0 | Wind | ||
| DarkShwl | Alice | MagiCoat | Dark | Black | 0 | 0 | 90 | 0 | 0 | 0 | Dark | ||
| AirShawl | Alice | MagiCoat | Sky | Wind | 0 | 0 | 90 | 0 | 0 | 0 | Wind | ||
| Uminchu | Alice | BlckDogi | Hope | Sea | 0 | 0 | 110 | 0 | 0 | 0 | Water | ||
| Dark Rex | Alice | LumnMail | Lonely | Quiet | 0 | 0 | 130 | 0 | 0 | 0 | Dark | ||
| AquaSoul | Alice | LumnMail | Water | Soul | 0 | 0 | 130 | 0 | 0 | 0 | Water | ||
| TrntShwl | Alice | MagiCoat | Water | Blue | 0 | 0 | 90 | 0 | 0 | 0 | Water | ||
| Woodsuit | Therese | LumnMail | Fallen | Tree | 0 | 0 | 130 | 0 | 0 | 0 | Earth | ||
| Kariginu | Therese | BrwnDogi | Red | Beast | 0 | 0 | 110 | 0 | 0 | 0 | Fire | ||
| Momiji | Therese | WhtDogi | Song | Poet | 0 | 0 | 110 | 0 | 0 | 0 | Earth | ||
| Dawn Shwl | Therese | MagiCoat | Light | Yellow | 0 | 0 | 90 | 0 | 0 | 0 | Light | ||
| NatrShwl | Therese | MagiCoat | Tree | Green | 0 | 0 | 90 | 0 | 0 | 0 | Earth | ||
| LeafSuit | Therese | Overalls | Earth | Green | 0 | 0 | 100 | 0 | 0 | 0 | Earth | ||
| SolShell | Therese | FineSuit | Moon | Yellow | 0 | 0 | 100 | 0 | 0 | 0 | Light | ||
| LapisRbe | Therese | Lux Robe | Pure | World | 0 | 0 | 90 | 0 | 0 | 0 | Neutral | ||
| VitaMail | Therese | Andre Ar | Hot | Guts | 150 | 0 | 100 | 0 | 0 | 0 | Neutral | ||
| FireShwl | Therese | MagiCoat | Flame | Red | 0 | 0 | 90 | 0 | 0 | 0 | Fire | ||
| RymCloak | Therese | RuneSuit | Love | Eternal | 0 | 0 | 120 | 0 | 0 | 0 | Dragon | ||
| Rym Mail | Therese | RuneMail | Dragon | White | 0 | 0 | 140 | 20 | 20 | 20 | Neutral | ||
| Absorber | Therese | Leather | Flow | Counter | 0 | 0 | 130 | 0 | 0 | 50 | Neutral |
Accessory Recipes
- There’s only one type of accessory, so that column is omitted.
| Name | Apprentice | Base Equipment | Vitae | Vitae | HP | MP | ATK | GRD | SPD | TEC | MAG | RES | Effect | Notes |
|---|---|---|---|---|---|---|---|---|---|---|---|---|---|---|
| Amplifier | Alice | StarCharm | Flow | Light | 0 | 50 | 0 | 0 | 0 | 0 | 0 | 20 | ||
| AquaRing | Alice | RuneRing | Shidoshi | Water | 0 | 0 | 0 | 0 | 0 | 0 | 0 | 0 | Reduces Water damage taken by 25% | |
| AquaSoul | Alice | AquaRing | Romance | Sea | 0 | 0 | 0 | 0 | 0 | 0 | 0 | 0 | Nullifies Water damage taken | |
| Booster | Therese | RuneBand | Counter | World | 75 | 75 | 0 | 0 | 0 | 0 | 0 | 0 | ||
| DarkRing | Alice | RuneRing | Dark | Poet | 0 | 0 | 0 | 0 | 0 | 0 | 0 | 0 | Reduces Dark damage taken by 25% | |
| DarkSoul | Alice | DarkRing | Quiet | Moon | 0 | 0 | 0 | 0 | 0 | 0 | 0 | 0 | Nullifies Dark damage taken | |
| Dumbbell | Alice | RuneBand | Love | Heart | 125 | 0 | 0 | 0 | 0 | 0 | 0 | 0 | ||
| ElecRing | Therese | RuneRing | Thunder | Sage | 0 | 0 | 0 | 0 | 0 | 0 | 0 | 0 | Reduces Thunder damage taken by 25% | |
| ElecSoul | Therese | ElecRing | Lonely | Heaven | 0 | 0 | 0 | 0 | 0 | 0 | 0 | 0 | Nullifies Thunder damage taken | |
| Ephemera | Alice | StarCharm | Black | Sage | 0 | 0 | 0 | 0 | 0 | 0 | 100 | -100 | ||
| FireRing | Therese | RuneRing | Flame | Warrior | 0 | 0 | 0 | 0 | 0 | 0 | 0 | 0 | Reduces Fire damage taken by 25% | |
| FireSoul | Therese | FireRing | Hot | Hell | 0 | 0 | 0 | 0 | 0 | 0 | 0 | 0 | Nullifies Fire damage taken | |
| FP Boost | Therese | RuneBand | Dragon | Guts | 0 | 0 | 0 | 0 | 0 | 0 | 0 | 0 | Increases FP gains by 10% | |
| FPCharge | Alice | RuneBand | Warrior | Century | 0 | 0 | 0 | 0 | 0 | 0 | 0 | 0 | FP +50 | Equivalent to starting battles with half of 1 FP bar. |
| HvyGuard | Therese | Sandals | Earth | Anger | 0 | 0 | -100 | 100 | 0 | 0 | 0 | 0 | ||
| Jetpack | Alice | Sandals | Pierce | Wind | 0 | 0 | 0 | 0 | 100 | -100 | 0 | 0 | ||
| Lifehack | Therese | StarCharm | Heart | Sad | -100 | 100 | 0 | 0 | 0 | 0 | 0 | 0 | ||
| LifeRing | Therese | RuneRing | Water | Flow | 50 | 0 | 0 | 20 | 0 | 0 | 0 | 0 | ||
| LumnRing | Therese | RuneRing | Goddess | Light | 0 | 0 | 0 | 0 | 0 | 0 | 0 | 0 | Reduces Light damage taken by 25% | |
| LumnSoul | Therese | LumnRing | Soul | Hope | 0 | 0 | 0 | 0 | 0 | 0 | 0 | 0 | Nullifies Light damage taken | |
| MoonCharm | Alice | StarCharm | Eternal | Moon | 0 | 0 | 0 | 0 | 0 | 0 | 0 | 0 | Grants immunity to all status ailments | |
| RedLine | Alice | Sandals | Purple | Shidoshi | 0 | 0 | 0 | 0 | 0 | 0 | 0 | 0 | ||
| RuseRing | Therese | RuneRing | Century | Kill | 50 | 50 | 50 | 50 | 50 | 50 | 50 | 50 | FP is always set to 0 | Large stat boosts in exchange for disabling Flash Drives. |
| Sleipnir | Alice | Sandals | Lonely | Beast | 0 | 0 | 0 | 0 | 0 | 0 | 0 | 0 | MOVE +1 | The only way to increase MOVE. |
| Stabler | Therese | StarCharm | Guardian | Guts | 0 | 0 | 0 | 0 | 0 | 0 | -100 | 100 | ||
| SunCharm | Therese | StarCharm | Eternal | Sun | 0 | 0 | 0 | 0 | 0 | 0 | 0 | 0 | Grants immunity to stat reductions | |
| UltraSoul | Alice | Amplifier | Dark | Sage | 0 | 0 | 0 | 0 | 0 | 0 | 0 | 0 | Reduces MP cost of Magic | |
| WindRing | Alice | RuneRing | Wind | Bird | 0 | 0 | 0 | 0 | 0 | 0 | 0 | 0 | Reduces Wind damage taken by 25% | |
| WindSoul | Alice | WindRing | Pierce | Cloud | 0 | 0 | 0 | 0 | 0 | 0 | 0 | 0 | Nullifies Wind damage taken | |
| WoodRing | Therese | RuneRing | Tree | Beast | 0 | 0 | 0 | 0 | 0 | 0 | 0 | 0 | Reduces Earth damage taken by 25% | |
| WoodSoul | Therese | WoodRing | Wall | Earth | 0 | 0 | 0 | 0 | 0 | 0 | 0 | 0 | Nullifies Earth damage taken | |
| ZenCharm | Therese | Sandals | Blue | Shidoshi | 0 | 0 | 0 | 0 | -100 | 100 | 0 | 0 |
Party Member Analysis & Recommended Equipment
Party member names reveal plot developments and can be considered spoilers, so I’ve condensed this section.
Regarding Equipment, most Luminous Arc Equipment has linear value progression; the newer Equipment has a higher number, so it’s objectively superior. There are occasional exceptions, like when a piece of Equipment has an unorthodox statline. It might offer a bonus to a non-offensive stat, which can make you reconsider upgrading to subsequent Equipment with higher offensive stats. Normally, these considerations are eventually decided for you, because the offensive stat difference will overwhelm gains in other stats.
The debate over what a party member’s optimal piece of Equipment is becomes most relevant for the final few pieces of Equipment. If a character’s two best Equipment pieces have them choosing between min-maxing a stat or distributing their stats more evenly, then you’ll have to make a subjective judgment call. There are many cases where someone’s potential best Equipment does not come from unique Equipment obtained via Imbuing, but rather Imbuing preferred stat boosts to a generic piece of Equipment.
Armor is somewhat an exception. The optimal Armors are universally unique Armor obtained from Imbuing. However, two unique Armors can have radically different stat boosts, and there may be an argument for which is preferable.
I actually have disagreements with what some players consider to be a character’s best piece of Equipment, and the Equipment tab will cover those.
Click to reveal section.
Leon
Skills
Magic
Flash Drives
Equipment Recs
Leon is a ridiculous powerhouse from the word “go.” His starting Skill, Charge, allows him to buff his own ATK for a pittance of MP. Leon should be using Charge whenever there’s no possible attack targets. With his already naturally high ATK, Charge can put Leon in the range of one-shotting enemies at full HP. He’s good at killing things and can take hits, to boot. What’s not to like?
Well, he is a bit on the slow side. His 4 MOVE is perfectly average, but party members of equal MOVE typically have more ranged attack options than Leon, and their ability to attack more often somewhat overcomes Leon’s higher DPT. This depends heavily on the map being played and where Leon spawns, however. There’s a tendency for units chosen first pre-map to spawn towards the frontlines, so have Leon be the first unit you select.
Leon eventually learns SkyFire, a cross-pattern MAG-based Skill that inflicts Fire damage. It’s a great way to inflict chip damage and earn EXP while enemies are out of reach, and its damage can sometimes be decent thanks to some of Leon’s weapons increasing his MAG.
Leon’s strategy is simple: use Charge on his first turn, SkyFire or FPCharge when enemies are out of range, and X-Slash or HoundClaw on every target. His other utility Skills aren’t really worth considering.
Charge (6 MP)
Raises Leon’s ATK for 4 turns. An incredibly good Skill that potentially allows Leon to kill full-HP enemies with a single attack. Use it constantly to earn EXP and reset the 4-turn timer.
Breakthru (8 MP)
Inflicts 0.9x physical damage to an adjacent target and lower their GUARD for 3 turns. You can often kill the enemy outright by using a stronger Skill, but if you can’t, consider using Breakthru. Also, even if you do have a stronger Skill, Breakthru can be used to kill enemies while consuming less MP, just to make sure you have 100% accuracy (Skills can’t miss).
X-Slash (12 MP)
Inflicts 1.5x physical damage to an adjacent target. Pure DPT. Use excessively.
SkyFire (14 MP)
Inflicts 2x Fire Element Magic damage on five targets in a cross pattern. Uses Leon’s MAG stat. While Leon’s MAG stat is unsurprisingly poor, SkyFire’s high damage modifier partially makes up for that. Some of Leon’s Broadswords also boost MAG in addition to ATK, and these two factors can make SkyFire surprisingly potent.
As tempting as it may be to fully outfit Leon for ATK, I think SkyFire is strategically useful enough to consider keeping his MAG stat usable. Watch SkyFire’s damage output and refocus Leon’s stats as necessary. For some points of the game, SkyFire won’t deal any relevant damage because Leon’s MAG-boosting Broadsword options will be too outdated. Regardless, use SkyFire frequently to get Leon EXP from attacking enemies, which is greater than what he earns from Charge, etc.
LionRoar (16 MP)
Chance of inflicting Silence status on the eight spaces surrounding Leon. Deals no damage. Requires Leon to be so close to his targets that you’re often giving up attack opportunities to use it—so don’t. Silence is borderline irrelevant, and nothing “silences” enemies better than just killing them.
Final Rest (9 MP)
Inflicts 1.3x physical damage to enemies inflicted with Sleep status (1x by default). Weaker than preceding and subsequent Skills. Its only use is dealing 10% more damage than Breakthru, so if you just need the guaranteed accuracy from a Skill but Breakthru isn’t strong enough… there you go.
FPCharge (25 MP)
Increases Leon’s FP by half of a complete bar. If you already have an ATK buff from Charge or whatever else and have no opportunities to inflict meaningful damage, you may as well use FPCharge.
HoundClaw (40 MP)
Inflicts 3x physical damage to an adjacent target. The strongest Skill/Magic technique in Luminous Arc. Nothing else compares. Use HoundClaw on everything, but mind Leon’s MP.
Leon learns no Magic. However, SkyFire deals Magic-based damage and therefore uses his MAG stat.
All of Leon’s Flash Drives temporarily decrease enemies’ GUARD.
Edge Slash
A straightforward, single-target strike. After acquiring X-Slash, Edge Slash should never be used unless you’re desperate to conserve MP.
Burning Leo
A two-range attack in a straight line. Literally Leon’s only physical ranged attack, making Burning Leo Leon’s most practically useful Flash Drive. Good luck hitting 2 FP before Leon is already in reach of enemies, however.
Burn Drive
Strikes all eight squares around Leon. Potential for huge AoE damage, but the required 3 FP and positioning needed virtually never comes up.
Leon is obviously a dedicated physical attacker, so it may not occur to some players how useful his SkyFire Skill is, which uses his MAG stat. Leon has no other ranged attacks, so on many turns, his only method of inflicting damage is SkyFire. Depending on how much damage it inflicts, Leon can make up for any increased physical damage he may have obtained from weapons that solely boost his ATK. It also allows you more strategic options, like being able to kill low-HP enemies from a distance or hit multiple targets at once. SkyFire’s potency peaks in the midgame.
In the endgame, Leon can better argue for a purely ATK-focused approach. His FP Charge Skill gives him something to do on turns when he has no targets within reach, as opposed to simply reapplying Charge, so losing relevant SkyFire damage isn’t as much of an opportunity loss. His final attack Skill also offers such a high damage multiplier that it becomes harder for SkyFire to make up the difference. Enemy HP values also balloon to where Leon is, even more than before, one of the only characters capable of killing an enemy at max HP—but he still might need to min-max his ATK to do so.
Heath
Skills
Magic
Flash Drives
Equipment Recs
At first, Heath is unusual for his split offenses between physical damage and Magic damage. I think this was done primarily to give players access to Magic before the story introduces them to Witches, because Heath soon stops learning new Magic techniques.
From that point, Heath is mainly a physical powerhouse with decent range and some helpful support Skills. Between Crusader, Protector, and HolyPride, he’s always able to find something to do, and PileBunker gives him high DPT as well. His Flash Drives even give him unique attack ranges compared to his other Skills/Magic, and the same can be said for his two-range basic attack. An excellent party member.
PwrThrust (6 MP)
Inflicts 1x physical damage to two spaces in a straight line. Essentially a standard spear attack, except the further away target doesn’t suffer the usual damage penalty. Situationally useful, but most scenarios will have you prefer either PileBunker or Crusader.
PileBunker (8 MP)
Inflicts 1.2x physical damage to an adjacent target. Not a huge multiplier, but it can really add up when Heath is buffed by HolyPride. Expect to use PileBunker a lot.
Crusader (12 MP)
Inflicts 0.8x physical damage in a cross pattern at a range of 1-3 spaces. Unless I’m forgetting something, this is the best AoE physical attack in Luminous Arc relative to its damage, range, and number of targets. You should be using Crusader constantly. Hitting just two targets with it exceeds the damage from any of Heath’s other Skills (i.e., 1.6x vs. 1.2x). Be mindful of its vertical range, because it’s smaller than Magic. Regardless, Crusader should make Drang completely obsolete.
Protector (8 MP)
Raises GUARD of affected units for three turns. Uses a cross pattern. A great way to raise Heath’s EXP, and a fine effect, to boot. If you can reach an enemy the following turn, use HolyPride. If you can’t, use Protector.
HolyPride (20 MP)
Raises Heath’s Attack, Speed, Guard, and Tech for three turns. The best buff in the game, limited only by the fact it’s restricted to Heath. A Magic and Res buff would be preferable to Speed and Tech, but beggars can’t be choosers. Use HolyPride and watch as Heath tears through enemies with PileBunker and Crusader.
Sturm (6 MP)
Inflicts small Thunder damage to one target. Useful early on for some added range, but is eventually made irrelevant by Crusader.
Atk DOWN (8 MP)
Lowers Attack of targets in a cross pattern for three turns. Heath’s only Magic technique that’s worth a damn, and not by much. If you’re down to fighting one stubborn enemy, this can be more efficient than casting Protector, but you’re almost certainly better off just having Heath attack.
Drang (16 MP)
Inflicts medium Thunder damage to targets in a cross pattern. Drang can sometimes reach elevations that Crusader can’t, but its damage output is so low that I think Heath is better off applying one of his buffs or attacking other (if fewer) targets. You’ll probably never use Drang after a point.
All of Heath’s Flash Drives temporarily decrease enemies’ Speed.
Pierce Rush
Bolt Impact
Knight Honor
Gungnir (+30 Attack, Dragon)
Heath’s strongest unique weapon is the Brionac (Alice: FineSpear + Sad + Warrior), but his weapon with the actual highest attack stat is a purchasable Gungnir Imbued with a +30 ATTACK Vitae. I recommend an Imbued Gungnir with the Dragon Element.
RuneHelm
Purchased from Round Table Council HQ.
Absorber
Armor should be either the Absorber (Therese: Leather Armor + Counter + Flow) or RymMail (Therese: RuneMail + White + Dragon). The Absorber offers the highest Resist (Guard +130, Resist +50), but the RymMail boosts more stats and has slightly more Guard (Guard +140, Resist/Speed/Tech +20). I think whichever you pick is kind of a wash, but I lean towards the Absorber. For what it’s worth, the boost to Speed and Tech is basically irrelevant.
RedLine / Sleipnir
As for Accessories, Heath utilizes the RedLine (+100 Attack, -100 Guard) well because of HolyPride offsetting the Guard penalty by buffing the same stat. His Flash Drives are mildly useful for their added range and damage, because PileBunker has a small attack modifier, so RuseRings are harder to justify for him. Two RedLines (if you can even get two) might make Heath too frail, but you can certainly try it. Since the boosts from ordinary Accessories cap at +10, it might just be best to slap on a Sleipnir, if you have any to spare.
Saki
Equipment Recs
Saki is an oddball unit. At a glance, she’s a “jack of all trades, master of none” archetype. Underscoring that, however, is that some of her utility is borderline worthless in addition to there being no practical benefit from her divided specialties.
Two of her most potent traits are her MOVE of 5, which is tied with one other character as the highest in the game, and her mid-range basic attack that can hit two enemies at once. Once more, this is matched only by one other party member, Heath.
From there, things start to fall apart. Saki’s greatest stat is Speed, which is the least valuable of the six (if not Tech, which is Saki’s second-highest stat). It’s mainly used to calculate evasion chance against basic physical attacks. The most threatening attacks such as Skills, Flash Drives, and Magic all have fixed, 100% accuracy. To reiterate, Speed doesn’t primarily influence turn order; MOVE does. If units have a tied MOVE stat, the unit with higher Speed takes priority. It does benefit Saki that she moves so quickly, and in some cases, she can move twice before others move once, but this is unreliable due to RNG.
But what does Saki do with her mobility? Well, she’s a hybrid physical/Magic attacker, which is certainly unique… but more often than not to her detriment. Luminous Arc simply doesn’t design enemies or maps in a way where it’s beneficial to swap between offensive stats on the fly. If enemies are more vulnerable to physical attacks than magic or vice versa, it’s never by such a degree that the reduction can’t be overcome by min-maxing a character’s preferred offensive stat. Simply put, you’re unlikely to ever encounter a situation where you’re thankful that Saki can choose between using her ATK or MAG to fight; you’ll just wish either one of those stats was higher.
There are two ways one can best utilize Saki. One is to have her use her high MOVE to act as a medic, using consumable items on those who need them. This isn’t as great as it sounds, since any powerful unit can become an impromptu medic if needed, but Saki can’t simply choose to be powerful. Also, consumables become increasingly outclassed by healing Magic.
The second method is to just cut Saki’s losses and min-max one of her offensive stats. Check the Equipment tab for details. Saki is often considered the worst party member in Luminous Arc, and that might be true, but that doesn’t mean she can’t contribute at all.
Early on, emphasizing MAG gives Saki her best single-target damage and offers increased range, but ATK optimizes her two-range basic attack, so I could see either being preferable.
Once she learns ChiStrike, she can ignore her initial MAG Skills completely. After learning Raijin and Fuujin, she can strike up to five targets at once, so outfit her for a high MAG stat. On occasion, ChiStrike can be used to reach further than her other Skills, and her basic attack can outperform the aforementioned Skills when used against high-RES enemies such as mages. Her DPT won’t compete with Witches, but other than one of them, Saki can more easily position herself to hit targets with AoE attacks.
When you reach the Workshop, use Imbue on Saki’s weapons to push her towards either ATK or MAG. Remember to swap out Accessories to boost your preferred stat. Ultimately, she’s a great candidate for RuseRings, since they significantly boost both ATK and MAG. Yeah, she loses Flash Drives, but they don’t use her MAG stat anyway.
Vivi
Equipment Recs
I’d consider Vivi to be among the best party members in the game, which is contrary to how I’ve seen others rank her. The reasons are quite simple: high movement and AoE attacks. Vivi can reach enemies quicker than anyone else on the team—meaning she’s the fastest to contribute—and her flight property lets her traverse gaps without movement loss.
It’s extremely easy to position Vivi for attacking two or more enemies at once with her Magic. While her single-target damage output isn’t exceptional, the ease of which she can set up multi-target attacks makes up for that. By the end of any map, the highest total damage inflicted to enemies by any party member is likely to be Vivi.
Lastly, Vivi’s frequent attack opportunities and buffs mean she’ll be leveling up and restoring her HP/MP constantly. Her movement and range even enable her to attack first then move outside of an enemy’s attack range. Between these two factors, a hit-and-run Vivi can be nigh invincible. Her natural fragility is barely relevant.
Early on, give Vivi an MP-boosting Accessory, then transition into solely buffing her MAG. Her Flash Drives are fairly unexceptional and probably the closest thing she has to a notable weakness. Use them for increased range and marginally higher damage when necessary.
Vivi should be zipping around the battlefield and nuking things with AoE Magic, so just go all-in on her MAG stat. Early on, her MP is susceptible to running out, so consider equipping one MP-boosting Accessory. Since her Flash Drives are lackluster, she benefits greatly from RuseRings.
Vivi’s highest-MAG weapon is Ifrit. Using Imbue, have Therese attach Flame and Hell Vitae to a SilvLamp.
Mavi
Equipment Recs
Mavi receives the greatest boost in ATK from GaiaFist, which compels many to equip it. I think this is a mistake. Most of Mavi’s equipment splits her ATK and MAG gains, and GaiaFist uniquely only gives her ATK. In most cases, you only want to prioritize one attack type, but this isn’t a great idea for Mavi. Her only methods of physical damage are basic attacks and FDs, and her MOVE isn’t high enough to reliably attack from one range every turn. Her Earth Magic is extremely helpful for doing decent chip damage as she approaches enemies which, along with the increased FD gain from attacking, should make up for damage lost from not equipping GaiaFist. While she can still use Earth Magic with GaiaFist, her damage output will be horrible to the point of irrelevance.
Vanessa
Equipment Recs
Vanessa, despite her aggressive portrayal, is a surprisingly versatile party member. Not only does her Magic spell list consist of damage, buffs, and status effects, she also has oddly potent physical attacks. She does a bit of everything, basically, and isn’t kneecapped by the three MOVE many other mages have.
Of course, Vanessa should be outfitted to maximize her MAG. Even if she can get close to enemies, she has no physical Skills, so a lack of a multiplier on her damage will leave you wanting. Some of her Scythes favor ATK over MAG, and you should ignore the former for the latter. She can buff the ATK of party members, which while not very useful for her, is otherwise incredibly useful. Later, she learns the precious MAG Block. Vanessa can swap between support Magic and offensive AoE magic on a dime.
Once she has MAG Block, you’ll need to keep an eye on her MP. Non-lethal attacks don’t give as much EXP as support magic does, so it’s possible that alternating between MAG Block and attack magic won’t always earn enough EXP to level up and heal her between running out of MP. MP-boosting Accessories are an option, but Vanessa’s magic damage output can sometimes be lacking, encouraging one to equip MAG-boosting Accessories. A loss of 10 MAG isn’t a huge deal, though.
Vanessa’s Scythes have unusually high ATK, which makes her basic attacks surprisingly potent. However, with no ATK-based Skills to provide a damage modifier, it’s rare that her basic attacks will outperform her Magic. She also has a difficult time being within range to even use a basic attack. Vanessa’s ideal Scythe should go all-in on raising MAG. Imbuing a DeathScy with +30 MAG is Vanessa’s best weapon overall. However, if you’re primarily using Vanessa for her support Magic, consider creating a Phoenix (Therese: DeathScy + Flame + Bird) for its +100 MP boost.
For her Headgear, consider a Ribbon over a LuxHood. It provides less RES, but grants total immunity to status effects, which late-game enemies can make quite a nuisance.
Accessories are a tough call. RuseRings can be great, but Vanessa’s Flash Drives are quite good. On the other hand, she requires building anough FP to use them, which doesn’t always happen. If you find yourself using her FDs often, consider MP-boosting Accessories or weaker MAG-boosting Accessories.
Mysteria Ruins (Post-Game Dungeon)
Click to reveal section.
On a New Game+, a location north of your Chapter 1 starting point opens up. Accessible immediately, this is Mysteria Ruins, an optional 25-floor/battle post-game dungeon featuring the strongest enemies in Luminous Arc. It should be noted that while certain NPCs mention the Mysteria Ruins on a first playthrough, the location still won’t open up until a New Game+.
Five map layouts are presented in a linear, repeating order, with only the enemies changing between them, and every fifth floor contains a boss enemy. Upon completing floors, you’ll be asked if you want to retreat or continue. Retreating allows you to keep all rewards, but you will have to start from the beginning upon return.
While you can’t traditionally save, access Shops, and so on, you can use suspend saves mid-map like always to create checkpoints. It’s best to create suspend saves at the end of each map, not the beginning. Once the map is completed, select to leave, then save your game on the world map. Then, resume your suspend save and continue the Ruins. With this method, you always have a way out if a map proves to be too much to handle.
Enemy levels begin comparably to where the storyline ends, i.e. 50-52, but increase by roughly ten levels every five floors. Thus, you might begin the dungeon at an appropriate power level, but eventually find yourself outclassed. You won’t level up at the same pace enemies do. This isn’t to say the Mysteria Ruins can’t be completed as soon as it’s available, just that you should know what to expect.
On a New Game+, you have to progress in order to regain access to all Shops and the Workshop. This is tedious, so you may want to do your Mysteria Ruins prep before defeating the final boss. Buy what you need, do Intermissions, get the best equipment, etc.
Your reward for completing Mysteria Ruins is a Sleipnir Accessory, plenty of EXP, and the potential to find the best Vitae in the game. It’s a location to challenge your party and/or power-level them.
F.A.Q. (Frequently Asked Questions) / Miscellaneous Stuff
Click to reveal section.
Am I Expected to Grind?
Click to reveal answer.
Not really. I went through the game doing most random battles only once and kept my levels on par with the enemy’s by frequently using support abilities. I rarely used mid-battle saves and sold almost all of my items. Some of the final maps were a little tricky, but I still beat them even with these self-imposed handicaps.
Are There Secret Party Members?
Click to reveal answer.
No. Every party member is obtained by progressing in the story.
Do Any Party Members Permanently Leave My Team?
Click to reveal answer (simple yes or no).
No.
Is There Permadeath? What Are the Consequences to Dying?
Click to reveal answer.
Nope. The only consequences to dying are the obvious ones: that character can’t help you for the rest of the map, and they can’t gain further EXP.
Can I Change My Party’s Default Starting Positions?
Click to reveal answer.
Unfortunately, no. Not directly, anyway. Each starting position corresponds to the order in which a party member is selected, so if you memorize that relationship, you can influence where everyone deploys. This is obviously a pain in the ass, but you can safely ignore doing it and still succeed.
Is the Sandals Accessory Useless?
Click to reveal answer.
On their own, Sandals have no effect when equipped. However, they’re a required component for Imbuing some of the best equipment in the game. Do not sell them.
Where Can I Get Sandals?
Click here to reveal answer.
One Sandals each can be obtained from maxing the relationship of Theo, Saki, and Kai through Intermissions. By default, these are the only obtainable Sandals. Purportedly, Sandals can be randomly obtained as a reward for winning in Wi-Fi battles, with some claiming a greater likelihood if you defeat a team with a higher average level.
In the modern day, you need to use custom servers to play online, and with the community being so limited, you’re probably best off spoofing battles between two different devices and files, then having one intentionally lose.
Can I Increase MOVE (Movement)?
Click here to reveal answer.
The only way to increase MOVE is by equipping the Sleipnir Accessory, which raises MOVE by 1 (commonly misspelled as “Slepnir”). Sleipnir can be created by using Imbue on Sandals. Also, you can obtain one Sleipnir from completing Mysteria Ruins for the first time, allowing for a default maximum of 4 Sleipnir Accessories. Sleipnir, like all Accessories, do stack.
Bugs / Glitches / Oddities
Click to reveal section.
- During action animations, the screen dims except for targets affected by the action to emphasize them. However, random unaffected targets are also highlighted for seemingly no reason.
- When Imbuing, Equipment in your possession sometimes won’t appear in the Equipment list, even when it’s compatible with Imbue.
I’m unsure what exactly causes this. When I noticed it happening, I swapped Equipment among my party members to change my inventory list, and eventually what I was looking for showed up. - Alkemion’s level three Flash Drive has a strange property where targets on certain map spaces receive minimal damage (a single digit). I have no idea if this is intentional, and if so, how you’re meant to know of it.
Leave a Reply