






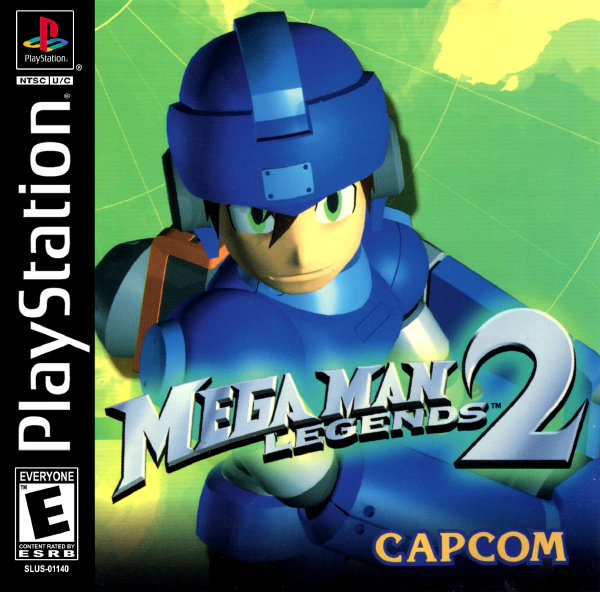
This section of Mega Man Legends 2 gave me so much grief that I decided to write a guide for it. These are strategies I found to work best, organized by each test room.
If my strategies aren’t working for you and you’d like more help, please let me know in the comments. I’m happy to expand the guide, if necessary.
General Tips
- MegaMan’s status during the test is entirely predetermined, and you cannot open the menu. In other words, the test is exactly as difficult at the start of the game as it is at the end. There’s nothing you can do to prepare for it, outside of gaining general game experience.
- It’s beneficial to complete all Digger Tests as soon as possible, which can be done the moment you reach Yosyonke City (go to the church to find the guild employee). Earning the A and S Class License items increases the amount of Zenny dropped by enemies. It also increases their HP, but that’s offset by the greater number of upgrades you can afford. The earlier you get your licenses, the sooner you can start earning more Zenny by playing the game the same way you would have otherwise.
- That said, don’t go insane over this. One could obviously argue the License items put you at an overall disadvantage, anyway. I think they make Legends 2 more fun, but if you’re miserable while attempting the tests, that defeats the purpose. The S Class test is genuinely really difficult, and even an experienced player can struggle with it. Don’t be disheartened.
- The most relevant part of earning the A and S Class License items for some players will be the fact they’re required to access optional Ruins. If you want to see all game content on Normal difficulty, the S Class Test is unavoidable. But, if you complete Legends 2 with an A Class License, you can unlock and play the Hard difficulty, which starts you with an S Class License! You can thereby sidestep the S Class Test. Obviously, the downside is having to start the game over on Hard difficulty.
- Personally, I thought it was easiest to use the default controls, or setting “A.”
- For weaker enemies, count the number of shots you need to destroy them instead of holding down the fire button. Any unnecessary shots will lock MegaMan to their animation(s), slowing him down.
- Lifting and throwing enemies (default: triangle) at other foes with the Lifter Sub-Weapon is incredibly important. Give up any hope of completing this test without doing so. Most enemies are capable of being lifted, but not all of them are worth lifting. You can still lock-on while lifting/throwing, so do so. You can also jump and throw, which can help reach certain targets. You need to be very close to an enemy to lift them, so getting a feel for the spacing without taking contact damage is paramount.
- If you’re ever hit with a status effect (you turn green and can’t use your Buster), restart. It takes far too long for it to wear off. It’s possible to be hit with a status effect but be able to spend most of its active time still progressing by lifting and throwing enemies. Such situations might be salvageable, but your first priority is to never be hit with status, no matter how much time you lose by ensuring so.
- I finished the test with almost exactly one minute left on the clock, so you do have a buffer to take some rooms safely.
- Without a doubt, the biggest time-wasters are the shield enemies. The last thing you want to do is fight them normally. Throw, throw, throw! You can spare fighting one, maybe two of them normally and still make time, but don’t make a habit of it.
- You can turn off the BGM in the options menu outside of the test, as it might help you pick up on audio cues. It’s a pretty minimal difference, since the BGM is just ambiance, but hey, every advantage counts, right?
Room 1
An empty room. The timer doesn’t begin until the door is opened. Nothing you do here matters, really. Meditate or something. I dunno.
Room 2
Engage, disengage, and engage your lock-on (default: R2) to target the first flying enemy. These take three shots to destroy, which you should count off. Head towards the grounded enemies, lift the closest one, and throw it at the other. Lift another, then make a tight turn around the first corner and lock-on to the shield-holding enemy closest to the left wall, then throw towards it. If you distance yourself perfectly, the shield enemy to its right shouldn’t aggro.
While in hit stun, the shield enemies can be picked up, so quickly run over and do so, then lock on to the remaining shield enemy and toss the previous one. This should destroy them both, saving significant time. Destroy the flying enemies that are left, counting off all of your shots and taking care not to be caught in the edge of their explosions.
Room 3
Prioritize destroying the green worms, as they can inflict status. They can be picked up and thrown, but I think it’s too risky considering the number of enemies, and the worms themselves are low enough to the ground to where your throws can fly over them. As you shoot the green worms, gradually strafe towards the right-side corners of the room. This puts distance between you and the balloon enemies while making it harder for the worms to target you for a lunge attack.
With the worms defeated, focus all attacks on the balloon spawner. Be extremely careful with lock-on, as MegaMan has a tendency to prioritize the balloons, and the rapidly changing perspective can confuse you, the turning will slow you down. You should run towards the spawner while manually firing, circle around to its back side, then, when close enough, use lock-on so that you’re guaranteed to target the spawner. Once locked on, fire at the spawner while circling it, taking care to weave through the balloons. Jump to avoid being surrounded, if necessary. Once the spawner is down, put distance between yourself and the balloons, then hold the lock-on and fire buttons until they’re destroyed.
Room 4
The shield enemy will keep its shield raised if you’re firing your Buster, regardless of whether or not you’re aiming at it. Taking advantage of this, fire while jumping onto the platform, then bait the flying enemy towards you as you drop down to the section you started from. Destroy the flying enemy, then fire shots to keep the shield enemy distracted, as before. Once you’re close enough, cease firing until the enemy begins to raise its gun, then resume firing. After stunning the enemy with a shot, pick it up and throw it towards one of the enemies below, then pick your target up and throw it at the remaining ground enemy. The flying enemies left are easily destroyed by spamming shots, so just lock-on and fire, keeping your distance as much as possible.
Room 5
Immediately run towards the right and lock-on to the balloon spawner, firing as much as possible as balloons start to close in. Critically, there is a limit to the amount of balloons that can be spawned. Ignore them. Ideally, the balloons will conglomerate towards a small bunch of them that’s easy to dodge. Do not use lock-on here unless you’re certain to target a balloon spawner. Use manual camera aiming (default: right analog) to find your way around.
Alternate your spawner targets, watching your back to know when to move away from the balloons. Don’t force yourself to only fight one spawner at a time, as they take too many hits. Prioritize the spawners in the middle and the right wall of where you started, hopefully destroying the spawner next to the door last, allowing you to finish off the balloons and immediately take the exist. Remember, you can always jump to dodge, if needed.
Room 6
Watching your distance, pick off all the flying enemies while counting your shots. Once they’re clear, focus on the shield enemies. This part is very tricky, as you can save an enormous amount of time by tossing the shield enemies at each other, which instantly destroys them. However, you have to be extremely careful of the second shield enemy hitting you with a status effect. If possible, find the max distance you can be to one enemy without the other aggroing. You can tell by whether or not they move to face you. Then, move towards your target while firing to keep the other enemy’s shield raised. Pick up your target and immediately lock-on to the other and throw.
If you have trouble with this, you can save enough time on other rooms to take this one slowly. Simply fight the shield enemies as normal, firing as they’re raising their weapon. One strategy you can use to save time is to toss the last shield enemy into a more open part of the room. This will let you fire at it while strafing, decreasing the chance of the enemy blocking your shots, as you’ll be firing towards their backside as you circle them.
Room 7
This is a straightforward slugfest. These enemies can’t be picked up, and they immediately aggro. All you can do is fire away while attempting to dodge. Lock-on and run in circles while firing at your target. If the enemies become spread out enough to where you’re at risk of the outside, non-targeted enemy intercepting you, run back a bit to widen the “circle” you’re “drawing” while running around the enemies. Jumping to dodge is extremely helpful here. Their lunging attacks have a wide ground-level hitbox but low vertical reach, so jumping can make them miss. Hopping whenever an enemy turns to face you is good practice, as it likely means they’re preparing for a lunge. The lunges are extremely quick, so keep as much distance from the enemies as possible while you fire at them. Once you open the exit door, the test is over.
The SS Class License
I feel compelled to cover this. Starting a playthrough on Very Hard difficulty, which is unlocked after finishing Legends 2 with an S Class License, starts you with an SS Class License. This is the only way to obtain an SS Class License on any Legends 2 playthrough. There is no SS Class Test of any kind (thank God).
Bucking the trend set by the A and S Class License items, the SS Class License is purely detrimental. All Zenny values are halved and enemies have even more HP than they do with an S Class License. The item is just there to prove you’re playing on Very Hard difficulty, I guess. Enjoy your license to tedium.
Leave a Reply