




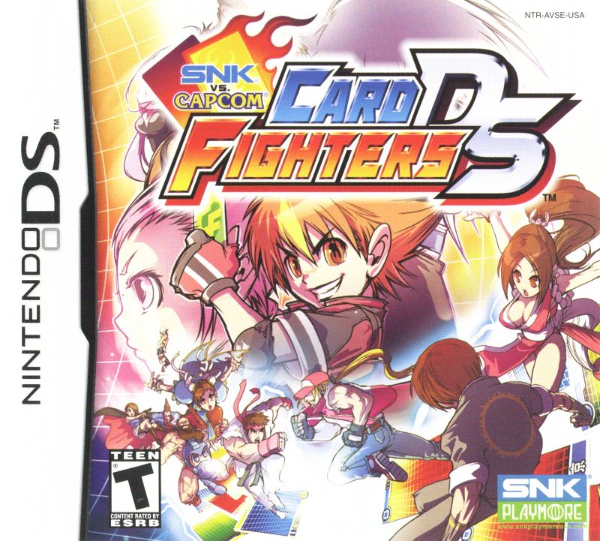
A general advice guide for SNK vs. Capcom Card Fighters DS.
Terminology
1W: A number and letter refers to a card’s Force cost and required colors. If I type 1W, that means a cost of one White Force icon.
“Neutral”: Another way of referring to White Force requirements, which can uniquely use Force of any color. Other color costs only accept that specific color.
TA/SA/CA: Triangle, square, and circle Abilities. Triangles can be activated upon summon, squares are manual actions, and circles are passively active as soon as that card hits the field. An Ability’s symbol is shown in the top left of a card’s artwork. It’s not listed in its description.
300/300: Numbers formatted in this way refer to a card’s statline. The first number represents HP while the second is BP.
Trait (Color) Commonalities
While types of Abilities and effects can overlap between Traits, looking at the Traits of Action/Counter cards with similar effects cements the idea that Traits are meant to specialize in certain areas. These are:
- Red: Stat manipulation (especially BP) and direct damage.
- Yellow: HP recovery, Force generation, and unfreezing characters.
- Blue: Sacrifice your own cards to gain some broader benefit like higher stats or damage.
- Green: Changing hand size, either by drawing cards or making your opponent discard their own.
Again, there are exceptions. Traits can possess the kinds of effects seen on Traits of different colors. These are just general behaviors.
Optimal Strategy
By far, the best deck is one consisting of neutral low-cost character cards with the highest possible BP. I won’t bother posting a specific deck recipe, because doing so would practically undermine how simple this game theory is. But for some examples, consider characters like Adon and Sean. Both only require 1W and boast a respectable 400 BP.
Prioritize low costs over stats, because what makes this strategy so effective is that each active character card rewards one Force at the start of a turn, allowing your resources to snowball and prevent the opponent from fighting back. Furthermore, more attacks per turn makes it impossible for your opponent to block all of them, so some direct damage always slips through and quickly piles up to a KO. By focusing on BP over HP, your opponent will be punished for spending resources on high-cost characters, as you’ll be spending less Force for comparable power while also earning more Force each turn. SNK vs. Capcom Card Fighters DS is a quantity over quality metagame. Or rather, quantity is quality. You should eventually phase out any character cards with a cost greater than two Force.
While neutral-cost cards are preferable, early on you can make some exceptions for particularly strong cards. Leona is a perfect example. She requires 1W/1G to play, but her 600/600 statline is extremely hard to beat for that price. Proto Man comes close with 500/500. Good 2W characters include Super Zion, Dudley, Sodom, and many more.
It may be sad to hear, but character Powers, Action cards, and Counter cards are nearly useless. Most effects in SNK vs. Capcom Card Fighters DS are absurdly overpriced and are not remotely worth their cost relative to other options. Whenever you read an effect, look at the cost and consider the benefit of spending that Force on summoning more characters to your field. You will get more attacks to slip past the opponent’s guard, more Force per turn, and another guardian for your own HP.
There are dozens of cards that inflict direct damage on the opponent for instance, but they require obscene amounts of Force to do as little as 300 or less damage. Meanwhile, there are even more dozens of characters with equal or greater BP that can be summoned with one Force then attack your opponent for direct damage. If you ever read an effect and ask yourself, “what’s the point,” there probably isn’t one. The game is extremely unbalanced.
There are a few Action cards actually worth looking at. Particularly, there’s four that I think should be in every single deck:
- Holy Star (Action)
- Worker Bees (Action)
- Treasure Hunt (Action)
- Fix-It Shop (Action)
Force Generation
- Holy Star (Action)
- Worker Bees (Action)
The first three of these generate Force. Holy Star and Worker Bees require one Force to play and roll a die to provide you an equal number of Force. Even if you’re unlucky enough to get the 1/6 outcome of 1 Force, you break even on cost. You lose the opportunity to play an additional one-cost character that could’ve been drawn instead of those Action cards, but the odds are in your favor, and the starting three Force isn’t enough to immediately summon your entire five-card opening hand anyway. Action cards like these are the only way to have more than three characters hit the field turn one, and with them, it’s entirely possible to KO the opponent on your second turn when they’re completely defenseless. You just need your BP to add up to 2000.
- Treasure Hunt (Action)
Treasure Hunt works differently in that it costs 3W to generate five random Force of any color for a profit of two Force. It’s potentially higher value than it looks, because you can obtain color Force necessary for characters that are stronger than any neutral characters, like Leona. Since Treasure Hunt is a guaranteed Force profit, it should always be the first card you play. Force-generation cards potentially giving you an excess of Force is why you don’t necessarily want to play only one-cost characters. If you have a Force surplus after already being able to play every character card in your hand, you may as well get better stats out of them. Having any character with a cost greater than two Force risks you not being able to play your entire hand, which should be your goal.
- Mudman (SNK)
Mudman costs 3W to summon and 2R for its TA, which instantly generates 10R if you have no Force after paying its cost. In other words, you need three Force of any color and 2R and nothing else. This is a five force profit and is the highest gain possible relative to how easy it is to pull off. Even the best dice roll from using Holy Star and Worker Bees only reward a five force profit after factoring in the card’s cost.
That fact makes Mudman pretty essential for fueling Fix-It Shop and Hyena Funfest in order to draw through as much of your deck as possible turn one to generate Force and flood the field with your best characters. You do have to pay attention to when to best play Mudman, however, since he can’t be used turn one without other cards. Ideally, you’ll be lucky enough to get the required Force you need from Action cards and summoning other low-cost characters to lower your Force to the minimum. But sometimes you’ll have to discard to get Red Force. Thankfully, many of the best 1W characters are Red, giving you plenty of opportunities to use Mudman.
Draw Power
- Fix-It Shop (Action)
Fix-It Shop takes three Force to draw three cards. It’s arguably the best card in the game because you’re guaranteed a better position from playing it. In a worst-case scenario, the cards you draw can be discarded to obtain three (color) Force; you break even, if not become able to play stronger, color-specific characters. Ideally, you’ll draw into your Force-generating cards and additional copies of Fix-It Shop for a crazy first-turn combo that floods your field with characters. If you’re not that lucky, you can still draw into better characters than what you opened, even if it’s as little as getting to play a 400/400 stat character instead of a 300/400 character. The only risk involved in Fix-It Shop is losing by drawing your entire deck, but I have never seen this happen.
- Hyena Funfest (Action)
Hyena Funfest is identical to Fix-It Shop, except it costs six Force to draw six cards. Once again, a one-to-one ratio with the possibility of profiting by drawing into Force-generating cards. It’s higher risk and higher reward as it can’t be used with your starting three Force, but it’s not hard to hit that with force-generating cards and Fix-It Shop.
Worse comes to worst, you may need to discard cards to pay for Hyena Funfest turn one, which could result in you fielding less characters at the turn’s end if you’re unlucky, but the odds are drastically in your favor and the consequences are almost never significant. Once you max out on copies of Force-generating cards and Fix-It Shop, I think Hyena Funfest is worth running four copies of as well. Be careful that you don’t run out of cards to draw with it.
Other noteworthy draw cards:
- Charge! (Counter)
Charge! is a Counter card that costs one Force to draw two cards—a net profit in Force and card quantity. Its only flaw is being a Counter card, meaning it depends on your opponent attacking and can only be played on the second turn at best. Also, you need to keep at least one Force to play it, which could be spent summoning more characters (the ideal play). Charge! is mostly good as an early-game card because it’s easy to obtain. It should eventually be phased out of any deck. Keep in mind that if Charge! draws into other copies of Charge!, those can be played the same turn (provided you have enough Force).
- Talking Trash (Action)
Talking Trash costs three Force to draw cards equal to the number of characters in the ring. Since each player can summon up to eight characters and the metagame encourages flooding the field, Talking Trash has the potential to be obscenely strong. In practice, it’s often a “dead” card. Going first, which you should always want to do, you have to play at least three characters to have Talking Trash equal Fix-It Shop. That requires a minimum of six Force total, which requires drawing Force-generating cards in addition to Talking Trash while still having enough characters to summon. That is a five-card combo; your entire opening hand has to be a specific arrangement of cards.
Talking Trash is much better going second because you won’t have to spend your own resources to populate the field, and if you do, you get more cards out of it. Versus the AI, most of your games will have you go first. You have a 50% chance to win the die roll, and if you lose, the AI has a 50% chance of choosing you to go first anyway, equating to a 75% chance of going first. Talking Trash is best used when facing human players, as they’re potentially aware of the benefits to always going first.
Update: I’ve reevaluated Talking Trash and now advocate running it in a low-cost character deck. When considering your turn’s total Force generation, a large chunk of it is going to be spent on flooding the field anyway since that’s your explicit goal, so having enough targets for Talking Trash to draw as much or more than Fix-It Shop is pretty easy to do. More draw power helps you avoid situations where you draw into too many Force-generating cards early on and not enough characters.
Other Action/Counter Cards of Note
There aren’t many.
- Death Wish (Action)
For 1W and 100 of the player’s HP, a character receives 300 additional BP. Early game, Death Wish is a fine substitute for low-cost characters. You can think of it as having another one-cost 300 BP character on the field. It’s not actually as good, because you don’t gain more attacks and Force per turn or another player HP defender, but it’s good enough.
Utility Characters
I mentioned that you should prioritize cost-to-power characters above all else, which is true, but early on you may want to consider some utility.
High Output Force
When characters take their turn to use the “Force” command they’ll generally earn you one Force icon of their Trait color. A very scant few characters can generate more than one Force. In your starting deck, one example is Fiona, who provides three Force of her Trait (Yellow) despite only costing one neutral Force to summon. Note that she still only earns one (Yellow) Force at the start of your turn, and that you can only get this Force profit from your second turn onwards. These characters should eventually be replaced with Action cards that generate Force, because they’re “faster.”
Decent Abilities & Other Worthwhile Characters
Boy, I’m really stretching the limits of what’s worthwhile here.
- Akuma (Capcom): Upon summon, for no cost, destroys one character with 600 or more BP. You’re forced to choose one of your own characters if your opponent has nothing that qualifies, and that can include Akuma himself. Be careful! At a 3W/3R summoning cost, this Ability struggles to be worth it.
- Dante (Capcom): Dante is a cheap-ish card with a TA that KOs all characters with 500 or less BP. This is one of the only ways to counter the optimal strategy of flooding the Ring with low-cost characters. If you’re going second, you can draw through your entire deck until you hit Dante, nuke the field, then proceed to use the same strategy that your opponent was attempting in hopes they don’t also draw into Dante. Isn’t this game fun? For PvP, I’d call Dante mandatory. For PvE, he’s only helpful against a few specific decks, but one of those is the boss of the Vegas Floor, so that’s something.
- Hinako Shijo (SNK): Spend two Green Force to draw one card. You can draw into Force-generating cards and draw power, or just another cheap fighter to make up for Shijo losing her own turn (granted, the new fighter can’t immediately attack). Her 300/300 statline isn’t abysmal for a two-cost character either, but needing one Green Force makes her difficult to play first turn, and games are typically too short for her draw power to become available and make a difference. Can be used each turn.
- Hyo (SNK): 1W/1R for 400/600. Roughly on par with Leona. For 3R, his TA damages himself and a chosen opponent character for 300. This versatility is nice when going second, as it can KO a card that could potentially protect the opponent and drag out a match. While the cost is hefty, you’ll sometimes get lucky with Force generation. Even if you can’t justify the Ability’s cost or go first, Hyo’s high BP and low appearance cost still makes him valuable.
- Jubei Yagyu (SNK): 2W/1G to appear and 2G for his TA. Spend two Green Force for both players to draw two cards upon Jubei’s summon. That totals 2W/3G for 500/500 and one additional card (discounting Jubei himself). This just barely equates to a resource profit. Like Shijo, Jubei’s problem is how much Force he hogs on the first turn. If you wait for your next turn, then that Jubei sitting in your hand could’ve been another character to summon on your first turn, potentially earning you victory much faster. Your opponent drawing doesn’t matter if it’s the AI, because their decks and play style are inept.
- Proto Man (Capcom): 1W/1G to appear, 2G for his SA, which draws two cards then forces you to discard one card from your entire hand. What makes this Ability interesting isn’t its inherent usefulness, but that Proto Man actually has good stats. He’s one of the very few characters to have both viable stats and a usable Ability. Will you use that Ability instead of just attacking? Probably not, but hey, at least there’s an option.
- Shinnosuke Kagami (SNK): 2W/1R appearance cost. His SA costs 1W/1R to return one Action card in your discard pile to your hand. If you exploit this to reuse Fix-It Shop or Force-generating cards, you can profit. The problem is, as always, giving up the chance to end the battle anyway by having Kagami attack with his decent 500/600 statline stats. At the very least, there’re a lot of one-cost characters that generate Red Force each turn.
- Ton Pooh (Capcom): Ton Pooh has no Ability, but her 400/400 stats are as high as a neutral one-cost character goes, and she generates Green Force that can be used to fuel some of the decent Abilities mentioned here. The only downside is having to use a character named “Ton Pooh.”
Game Progression
In SNK vs. Capcom Card Fighters DS you climb Card Tower’s 21 floors by defeating all opponents on your current floor. Early on, you’ll have to choose either a Capcom or SNK path. Most Tower floors are split between two rooms, or sides, and the Capcom/SNK path elevators can only travel across their own side. The same opponents are encountered along each path with the exception of bosses, whom are route-exclusive.
Occasionally, floors aren’t split, resulting in identical content for each route. This is typically because each route follows the same general story, and conjoined floors contain plot development. Separate floors may have different opponents to battle, but this is of extremely little consequence. For the most part, your chosen path determines only the card packs sold you at shops and whether or not your opponents prioritize Capcom or SNK cards (they’ll match your chosen route). There isn’t a strictly “better” path, and each path can buy some card packs of the opposite route later in the game. Just choose the route with the character cards you’d most like to see. You cannot mix path progression; once you choose a side, you’re locked to it until the Tower is completed.
New Game+
Upon defeating the final boss, you’ll be prompted to start Card Tower over from the first floor. You’ll retain all cards and CP, but your map progress will be wiped clean. This will present an opportunity to take the other path through the Tower, but you will once again be prevented from buying packs featuring the opposite side’s characters, even if you could access that shop on your first playthrough.
Which Packs to Buy
The first pack available to you is the Kido Special for 800 CP. This is really expensive, especially for the early game. Don’t ask me why the developers made the first pack prohibitively expensive.
It may be prudent to wait until you complete 4F. This unlocks the first 500 CP pack, either for SNK or Capcom characters depending on which side of the tower you chose to climb. Naturally, climbing the Capcom side unlocks Capcom packs and vice-versa.
There are definitely good cards in the Kido Special, and it helps that it pulls from both SNK and Capcom characters so that you don’t have to go without certain cards when locked to one route. However, I still recommend saving for the 500 CP pack because it carries the best Action cards in the game. You want four copies of Holy Star/Worker Bees/Treasure Hunt/Fix-It Shop as early as possible, so it’s a good idea to buy nothing but that pack until they’re obtained. The starter deck should be good enough to get you to 4F, especially since the AI is so incompetent. But if you do need some better (low-cost) cards, feel free to buy some Kido Special packs.
In any case, once you get the aforementioned staple cards, you’ll still want to gravitate towards purchasing early-game packs. This is because low-rarity cards tend to have low summoning costs, making them paradoxically the most valuable cards in the game. Fill your deck with those as detailed in the “Optimal Strategy” section.
Card Scratch-Offs
Other than buying packs, you can choose to spend 300 CP for one random card. For obtaining useful cards, this is a terrible deal. You get more and likely better cards from buying the basic 500 CP packs. The value just doesn’t equal out.
On the other hand, scratch-offs are the easiest way to obtain A-class rarity cards. Said cards will likely still suck despite their scarcity thanks to outrageous Force costs, but it makes scratch-offs a decent option for collectors.
Grinding/Farming & the Vegas Floor
Early Game
The first opponent to reward any CP amount worth a damn is the Card Hermit, the boss of 2F. At 700 CP per win, that’s almost one Kido Special pack each time.
Bosses award this amount consistently until the boss of 8F, who gives 800 CP. At that point you can leave the Card Hermit to grow old and perish.
The Vegas Floor
10F will be your best friend for a long time. Its four opponents all host betting matches. You can bet either a card of a specific rarity, a pack from your Pack Folder (select “No” after purchasing a pack), or CP. Even the lowest win from a CP bet equates to a minimum of two packs, so it’s generally the only thing worth caring about here.
When you first go through the Vegas Floor, you’ll need to place 3000 and 5000 CP bets, respectively. Following the floor’s completion, you can only place 1000 or 3000 CP bets. What a ripoff! Nothing for it, though. Since this game is super easy if you’re building your deck right, and because you can simply reload your save if you lose, just play the 3000 CP match. When you win, go buy some packs while making sure to stay above 3000 CP for future bets. Repeat as much as you want.
The pack bet is a little interesting because they offer a pack from the opposite side of the tower. This is the only way to get them before a New Game+. Also, the pack they offer is independent of your offer’s value. You can wager a 500 CP pack and win an 800+ CP pack! Because low-rarity cards are generally better than high-rarity cards, this isn’t as beneficial as it seems, but it can be nice for those after specific cards or attempting to complete their collection. If you’re just the latter, though, it’s best to simply wait until you can buy the other side’s packs with your farmed CP. It’s faster that way.
I’ve never gotten anything of value from the card bet. Not being able to see what you’ll win until the match starts makes this super inefficient, as a C rarity or lower wager is meaningless when considering the number of C rarity cards obtainable from cheap packs bought using CP-betting matches.
Battle Mode
Halfway through Card Tower you’ll unlock Battle Mode, which can be accessed from the title screen menu. This strange extra mode allows you to quickly battle a limited selection of the game’s bosses. Oddly enough, it’s the only way to play against Rico, who’s a default opponent in Battle Mode. CP rewards are decent, but since this mode unlocks after the Vegas Floor, it’s not a useful method for grinding CP. Most opponents are unlocked in Battle Mode upon being defeated once, but CEO Rip and Haruna must be found and defeated three times each before appearing in Battle Mode. Kido likewise needs to be beaten three times but it only counts when done on a New Game+.
The most relevant aspect of Battle Mode is hidden: after defeating an opponent a set number of times, you’ll obtain an A or S rarity card dependent on said opponent. You can only get this reward once. Generally, 10 wins are required to earn each reward. Exceptions are Rico and the Card Hermit, who each require 20 wins, and CEO Rip and Germont, who require 5 wins.
In true SNK vs. Capcom Card Fighters DS fashion, most of these high-rarity cards suck despite their obscurity. As such, your time is better spent grinding CP on the Vegas Floor and buying packs with superior low-rarity cards. Completionists can get copies of these cards by buying the Special Pack near the end of New Game+, which contains every card.
Leave a Reply