





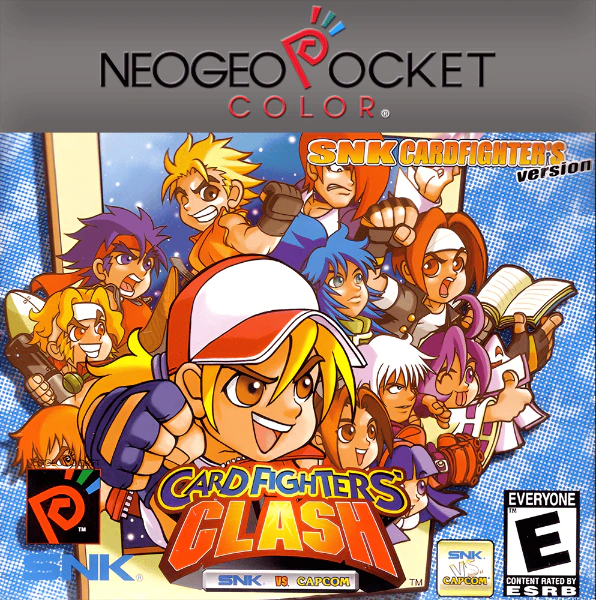
I find SNK vs. Capcom: Card Fighters’ Clash to be a very interesting game despite its innocuous first impression. So much so that I wanted a place to ramble my thoughts. Maybe you’ll find some of them useful. If you have any questions or requests for specific content, please leave a comment.
Fundamentals
Basics
- Try to ensure you have one character zone open at the start of your turn. Getting to replenish the total BP on your field, earn SP, and trigger triangle Abilities every turn is extremely important. If your field’s too full to play a new character, you risk losing a turn to build resources, and your opponent may gradually overtake you.
- Unite attacks are more than big, flashy attacks—they’re a fundamental part of Card Fighters and should regularly be used. They’re not merely useful for measuring up to the BP of your opponent’s strongest cards, either. They can “force” your opponent to KO your low-BP CHAs; have your weaker CHAs lead Unites so they’ll be KO’d and prevent your field from cluttering.
- During a Unite attack, a BP greater than your opponent’s counterattack has the difference inflicted to your opponent’s HP (piercing damage). Even if your opponent doesn’t take the bait as outlined above, they’ll shoulder a significant amount of damage. The SP used from routine Unites can be recouped by keeping your zones free to play more SP-generating CHAs.
- Single attacks (i.e., not Unites) won’t deal direct damage no matter what the difference in BP is between the characters; this isn’t Yu-Gi-Oh!. Therefore, it’s often a good strategy to have your weakest characters counterattack your opponent’s strongest single-attackers. They’ll entirely block the damage while freeing up your zones, and since your opponent’s CHAs aren’t KO’d, they risk their own zones becoming cluttered with weakened CHAs.
- Putting the above tips together, you should keep an eye out for when your opponent has enough SP to do pair-up attacks. If your entire field is weakened, low-BP characters and your opponent has an SP stockpile, they’re going to take the opportunity to swing for a bunch of damage. Allowing one or two Unites to go uninterrupted can be a good play, such as when your opponent ends turn with their zones completely full and less than 5 SP, because they’ll lose a main method of building SP for pair-ups and making progress towards whittling your HP.
Intermediate
- A potent strategy against the AI is to build your deck with a variety of common BP stats then counterattack the opponent’s characters until they’re as close to 100 BP as possible. If you’re the only one being KO’d, your zones will be open while your opponent’s become cluttered. While their character quantity will allow them some direct hits, they hardly matter if they’re only 100-200 HP of damage. After your opponent’s field is offensively neutered, fill up your field with your strongest characters and forgo attacking until you either have enough SP for pair-up or three characters. In the latter case, attack all at once. For the next two turns, your opponent will be forced to let some direct attacks through, but your attacks will be from characters with nearly full BP.
- You should be cautious of this strategy being used against you. Pair-ups offer a way out of it, but not if you can’t generate enough SP. The AI will never intentionally use this strategy and is even worse at countering it, but this game state can still happen incidentally and slow you down. Human players will actively try to set this situation up. Point is, some Abilities or Action cards that destroy your own characters are recommended in order to break out of this “lock.” Heritage is an extremely good example; it costs 0 SP so it’s always playable, and it draws cards equal to the destroyed characters, meaning it “replaces” itself at the very least. If you haven’t played a character for that turn, it’s basically free of any cost.
- As you gain access to cards with better Abilities, you should be more conscious of using cards that generate card advantage. Simply put, you want more total cards on the field and in your hand than your opponent. Don’t look at things solely in terms of HP and BP values. Have your strategic options be as broad as possible while your opponent has no choice over what they can play. Cards that add other cards to your hand, search specific cards from your deck, force the opponent to discard, or KO characters without fighting are exceptionally good cards. I’m basically describing the game theory behind tempo.
Exploiting the AI
Like any game, the AI in Card Fighters has idiosyncrasies that can be used to predict its behavior and gain an advantage. Because these don’t apply to human players, I’m separating this section from general strategy.
- When the AI is counterattacking, they prioritize your CHA with the highest BP. If you have CHAs with equal BP, they target your leftmost CHA (from your perspective). For this reason, CHAs you want to keep around, like ones with square and circle Abilities, should be placed in the middle or right column depending on how long you want them to survive. Conversely, triangle Ability CHAs are generally best-placed in the left column.
Card Analysis
There are many interesting cards in Card Fighters that are worthy of analysis. What I’ve covered here is by no means comprehensive, nor are they necessarily the best cards in the game. I’m just covering individual cards as I go based on what I feel like writing about.
Character (CHA) Cards
akira
500 BP
SP +5
Capcom
Rival Schools
Ability:
Upon play, look at the top cards of your deck until you reach an Action card, then add it to your hand. The other revealed cards are all discarded.
What do you do when you have two cards with the same name? Why, just write one entirely in lower-case. That’s not at all confusing in conversation. Anyway, akira is exceptionally superior to her capitalized counterpart. She’s one of very few CHAs able to immediately add a card to your hand, therefore giving you an advantage in card economy over your opponent. Additionally, she generates an excellent 5 SP while providing a respectable 500 BP to weaken an opposing CHA before she exits the field.
akira is undoubtedly a meta-viable card, but there’s so many powerful CHAs and ACs in the metagame that she’s arguably not worth the deck space. It’s not that she’s bad, but with only one CHA summon per turn, she has to compete with other resource-impacting cards like Andy and Sougetsu; it’s possible akira just doesn’t have an ideal opportunity to enter the Ring in some games. Her unusually high SP salvages her general value, but her statline is marginally inferior to Rose, who draws so many cards that you might reach whatever you hoped akira would add to hand. She makes decent bait for an overzealous opponent’s Akuma, at least.
I’ve seen the discard effect framed as a heavy cost, and you technically can deck yourself out with it if you’re unlucky, but it’s rarely relevant. At minimum, every deck should run three copies of Best Shot and Lucky Kitty, and just another playset of an AC makes ACs occupy about a fifth of your deck. You should generally hit something pretty quickly, and discard quantities should be small enough that they’re possibly beneficial. It helps you predict your draws, and you’ll almost never use your entire deck in one match.
Ability:
Upon being played, instantly KO any other character card on the field. If the Akuma is the only character card, there is no effect.
Legitimately one of the best Abilities in the game, Akuma generates crazy value for almost no effort. Turn three, plop an Akuma down to potentially get a free shot at your opponent’s HP using your character from turn one. Timed right, this can immediately eliminate around half of your opponent’s HP with them unable to do anything about it. If that’s not enough, Akuma’s own BP is high enough to contribute to your offenses after using his Ability. His only flaws are no Back-Ups and no SP generation, but that’s nothing relative to his overall value. You can run up to 3 copies of Akuma without worry.
ANDY
800 BP
SP +3
SNK
Fatal Fury
Ability:
Upon play, opponent discards one random card from their hand.
Beautifully potent in its simplicity. No matter what you get your opponent to discard, you now have one more card’s worth of resources than they do. That’s worth its weight in gold as is, but Andy has great stats to boot. 800 BP matches many other prominent triangle Ability characters, and 3 SP is the magic number for first-turn plays, as it covers both Lucky Kitty and Makeover. Andy even overpowers Sougetsu by 100 BP! An easy card to recommend multiple copies of.
B.B. HOOD
500 BP
SP +3
Capcom
Darkstalkers
Ability:
Upon activation, KO one enemy character of your choice, then B.B. Hood is shuffled back into your deck.
Pretty much powercreep for all other characters with retreat Abilities. Same utility, but with the bonus of KOing an enemy. B.B. Hood is quite a good card for mid to endgame, but isn’t worth it in an optimized deck. Her flaw comes from the fact that you’re using your one character summon per turn to set up a single KO, which really slows your tempo. Compare it to playing a high BP character that can survive at least two battle encounters; that’s three turns of value as opposed to B.B. Hood’s two.
BILLY
700 BP
SP +2
SNK
Fatal Fury
Ability:
Upon play, look at opponent’s hand and discard one Action card of your choice. If opponent has no AC cards, you still get to view their hand to confirm it.
While weaker than Andy, Billy makes up for it in other ways; he can view the opponent’s entire hand and select which card to discard (so long as it’s an AC card). If there’s no cards to discard, you get valuable information on your opponent’s hand and a tolerable statline from Billy. Billy can also support Krauser for when you want to make an offensive, game-ending push.
I think Billy is likely essential for PvP, but against the AI, one could justify not playing him. It’s not uncommon for the AI to have no AC cards in their hand when Billy comes out, and if there’s only one, Stifler can take care of it without costing you your one character-play per turn.
C. COMMANDO
700 BP
SP +4
Capcom
Captain Commando
Ability:
Upon activation, enters Freeze and inflicts 400 points of damage on all CHAs in Freeze.
Bit of a weird Ability. The Freeze clause seemingly only exists to make this a kamikaze attack, as CHAs Freeze after using Abilities anyway. When comparing his Ability to similar ones like that of Haggar and Akari (P), C. Commando’s is the weakest and most conditional, but he does possess the highest statline of the trio, with Haggar’s 700 BP and Akari (P)’s SP +4.
Is that enough to make up for his comparatively lesser Ability? No, not really. Since C. Commando has to wait a turn after being played to use his Ability, a human player can see what you’re intending a mile away and just not allow you to profit as much as you’d like from its use by withholding attacks. Even in PvE, having to be reactionary towards your opponent is too slow and risky. To get the most of the Ability, you’re incentivized to take three attacks from an opponent’s full Ring, and that’s just not good. C. Commando is best seen as a great filler card for the campaign. Use him for his high stats, and in the unlikely scenario his Ability happens to be useful, take advantage of it.
Ability:
Upon play, all SP is consumed to reduce all other characters’ BP to 100.
Chun-Li’s Ability is one of the hardest to deal with in all of Card Fighters. Being able (and incentivized) to use it at low or no SP is nuts relative to its effect. It’s arguably better than if it outright KO’d your opponent’s characters, because they’re now prevented from playing new characters and triggering their Abilities/generating SP. Now only able to threaten 300 HP of direct damage a turn, they’re completely at your mercy for clearing their own field. You also ensure they have at most 100 BP to reduce the damage of one of your Pair-Up attacks. Timed right, Chun-Li is nothing short of devastating. Run as many as you want.
DAIGO
800 BP
SP +0
Capcom
Rival Schools
Ability:
Upon play, BP is doubled if opponent has three CHAs in their Ring.
Holy Toledo! Daigo’s Ability potentially makes him the strongest-possible CHA card upon being played, surpassing Geese and Zero Akuma by just 100 BP. It’s cool that they gave Daigo a technical advantage over those, but as one acquires good cards, it gradually becomes harder to justify using Daigo in meta decks. High BP often isn’t as valuable as an exceptional Ability, and if you do need high BP, the unconditionally high stats of cards like Krauser and Mech Zangief eclipse the rare opportunities Daigo has to acquire 400 more BP (not to mention he has no SP gain). Quite a good tech card for single-player, but ought to be phased out eventually.
Ability:
Upon play, opponent loses 6 SP.
Fans of Dan can rejoice, because he’s genuinely a good card unlike his deliberately pathetic showings in most fighting games. Dan’s Ability is the largest one-sided SP-lowering effect in Card Fighters, and as a triangle Ability, it’s also fast. His stats are average but not unusable, which in totality makes him a versatile card that provides field presence while draining the opponent’s resources. That said, it’s easy enough to manipulate one’s own SP that I think Orochi is still a superior way of depleting an opponent’s SP. Also, I don’t think targeting the opponent’s SP is as potent as lowering their card economy via discarding effects and Sougetsu. If you’re lucky enough to obtain Dan early on, you can use him for a very long time.
DUCK KING
300 BP
SP +3
Capcom
Fatal Fury
Ability:
Upon play, raises an ally CHA’s BP by 300.
Don’t be fooled by his ridiculous name and appearance; Duck King is way better than you might expect. Due to his Ability, he’s at minimum a 600 BP/SP +3 C-rarity card, which is about as high as that rarity’s stats go. Duck King’s true strength, however, lies in his element of surprise. AI and human players alike will often make attacks based on their perceived risk of being counterattacked, and a subsequent Duck King can suddenly give your side enough BP needed to KO your opponent. Timed right, they literally can’t predict or counter this.
Outside of those “Duck King for game” moments (which are more common than you may think), Duck King is useful for making your Ring’s CHA stats equal to your opponent’s so that you can trade one-for-one in battles, freeing up your Ring while keeping your opponent from building up their own. Remember, a Duck King in the hand is worth two in the bush. Or something.
Ability:
Upon play, KOs one character in Freeze. This is mandatory; you’ll have to choose one of your own cards if your opponent has no CHAs in Freeze. If neither side has a Frozen CHA, the Ability does not trigger.
Evil Ryu is rather interesting. He unambiguously has the weakest spot-removal Ability in the game, but he also provides the most SP out of any of them, potentially allowing even more aggressive play than cards like Akuma/Wild Iori.
As your deck becomes more optimized, Evil Ryu’s condition becomes harder to fulfill; you’ll be removing CHAs via Abilities and KOing through counterattacks so frequently that your opponent will often not even make it to Freeze! On the other hand, a vanilla 700 BP / +3 SP card isn’t too bad, if you’re forced to play Evil Ryu without his Ability.
I think Evil Ryu isn’t as essential as Akuma/Wild Iori/Yashiro, but he’s still quite good. With three copies of all of those, enough draw power, and other impactful, more versatile Abilities like those of Sougetsu and Andy, Evil Ryu can feel redundant in an optimized deck.
GALFORD
300 BP
SP +2
SNK
Samurai Shodown
Ability:
Upon play, draw one card.
Galford is a fantastic card to fill out your deck before acquiring rarer, more powerful cards. He’s essentially a “free” card, replacing himself while providing field presence to defend your HP or just chip away at the opponent. Eventually, you’ll have enough strong effects to where you no longer want to waste a once-per-turn summon on drawing a random card, but until you get there, Galford should be glued to your deck. As gravy, Galford has Back-Up compatibility with several other decent midgame cards like Nakoruru and Rimururu.
Ability:
While active, the effects of all triangle Abilities are nullified.
If there’s ever a sizable PvP meta for Card Fighters, I suspect Guile would be a centralizing tech card. Triangle Abilities are generally the best cards in the game, and shutting them off can quickly put your opponent on their backfoot. The safest turn one play in the entire game might be to just plop down Guile, preventing your opponent from generating advantage with Akuma, Andy, Sougetsu, and any number of viable triangle Abilities. 700 BP is also enough to tank at least one attack from many decent characters. If you’re using Guile, you’re obviously incentivized to not rely too heavily on triangle Abilities in your deck, so you should build around him. Countering Guile encourages standard meta decks to consider slower, costlier alternatives to card removal such as square Abilities and Action cards.
HAGGAR
700 BP
SP +3
Capcom
Final Fight
Ability:
Upon activation, returns all CHAs in the Ring to their owners’ decks.
Well, that’s a bit extreme, isn’t it? Indeed, Haggar has one of the most destructive Abilities in the entire game. Depending on the situation, shuffling cards back is more harmful than KOing them, because your opponent can’t as effectively thin their deck for more predictable draws.
I think Haggar is best used for overcoming disadvantage from going second. If you go second, play Haggar, keep him alive for your next turn, then clean the Ring of CHAs and put down a new one; it’s as if you went first, now! Sort of. In reality, you have to take at least one direct attack; two, if Haggar can’t survive counterattacking either CHA. Haggar’s statline is awkward, as he’s KO’d by even some of the weaker meta-viable cards like Sougetsu. Who’s he intercepting? Saki? akira? Rose? Still, Haggar is an interesting card with unique strategic applications, and he also counters Chun-Li or Guile well.
HIRYU
900 BP
SP +3
Capcom
Strider
Ability:
Upon activation, KOs one CHA receiving Back-Up. I’ve not tested if this can be used on your own CHAs.
In terms of card design, Hiryu is the kind of card I’d love to see more of. He’s extremely well-balanced. His BP is on the high side but not among the heaviest hitters, but his SP gain is unusually high relative to CHAs with greater BP. While Krauser/Mech Zangief are exceptions to that rule, Hiryu still has something they don’t have: a decent Ability. Everything about Hiryu is well-considered enough to make him a decent addition to any deck.
But is he an optimal addition? That’s the question. I think Hiryu’s versatility is undermined by the metagame’s lacking need of versatility. Akuma is a meta staple even though he’s not necessarily versatile (0 SP gain) because his polarizing trait, his Ability, is just that impactful. Furthermore, Hiryu’s Ability, one of the things that ought to be justifying his stats, isn’t that great in meta settings. The best cards in the game rarely back Back-Up compatibility, so it’s common to go entire games without either player using Back-Up—in which case, Hiryu’s Ability may as well not even exist.
In the single-player campaign, however, Hiryu is excellent. Even the toughest AI opponents tend to run some CHAs seemingly just for the purpose of Back-Up, so Hiryu having a target isn’t that rare. While 900 BP / +3 SP is nothing to scoff at, an optimized deck should have enough choices for either raw stats or powerful Abilities to not need to bother with Hiryu. I think Jin Saotome is broadly a better Hiryu. He loses 100 BP for 1 more SP, so he breaks even stat-wise, but his Ability is so much easier to utilize. Hiryu not needing to KO himself is great, but you can easily turn that into an advantage for Jin Saotome because you always want one open space in your Ring at the start of your turn
Of mild interest is Hiryu being able to receive Back-Up three times from Option. Option is kind of a bad card on its own, but if you were going to attempt long-term field control with Hiryu’s Ability, you could replenish his BP with Option, delaying the need to get Hiryu off the field. I don’t think this is a meta-viable strategy because of having to waste deck space on Option, but it’s an amusing thought.
JIN SAOTOME
800 BP
SP +4
Capcom
Cyberbots: Fullmetal Madness
Ability:
Upon activation, KOs Jin Saotome and one enemy character of your choice.
One of the few destruction Abilities worth a look for an optimized deck. What really counts is 800 BP is just enough to run over top-tier Ability cards like Sougetsu, and you obviously want Jin Saotome as close to 100 BP as possible before KOing him, getting the most value out of him. Also, his +4 SP is unusually high for an 800+ BP character with an Ability. With an incentive to play him early, more opportunities will come up for Jin to counter specific BP totals that leave him close to KO. Jin Saotome can receive up to three Back-Up from Blodia, but Blodia is a lousy card by the endgame, and you don’t typically want Jin to overstay his welcome with more BP. Though it’s worth noting that one Back-Up puts him above 1000 BP characters.
KRAUSER
1200 BP
SP +5
SNK
Fatal Fury
Ability:
None.
Good lord. What an absolute unit. Krauser’s stats speak for themselves. Only two other cards have higher base BP (Geese and Zero Akuma), but they don’t provide any SP like Krauser. I think that’s enough to make Krauser and his Capcom counterpart Mech Zangief preferable. If you’re immediately sniped by Akuma or Wild Iori, you don’t eat a net loss of resources thanks to gaining 5 SP. On top of that, 5 SP is enough to fuel a Unite Attack, which is obviously going to hit pretty damn hard when this guy’s involved. And if that’s not enough, Krauser is one of the few meta-viable cards able to receive Back-Up from another meta-viable card: Billy. That doesn’t apply in reverse, but you’d probably never want to lose a Krauser just to give Billy +300 BP.
KYOKO
600 BP
SP +2
Capcom
Rival Schools
Ability:
Upon play, remove Freeze status from every CHA in your Ring.
Upon first glance, Kyoko may seem redundant; you have to play her at the start of your turn to use her Ability, but CHAs unfreeze at the start of every turn, anyway? The real benefit of Kyoko is that you can play her after your CHAs use any square Abilities, freeing them up for an attack or a second use of their Ability!
If you’re building a deck that relies on square Abilities, Kyoko is essential for making it even remotely playable. However, the fact you need Abilities like hers on-hand along with your square Ability CHAs means that your deck will be inherently more inconsistent than meta strategies that rely on triangle Abilities. Kyoko also struggles to be useful as a general utility CHA because her stats are just barely not good enough to cut it as an impromptu fighter. Her Back-Up options are lousy, too. A good card in niche decks, but that’s all.
LEONA
400 BP
SP +2
SNK
The King of Fighters
Ability:
Upon play, inflict 200 BP of damage to any other character card. This is mandatory. If this Leona is the only character on the field, the Ability does nothing.
Probably one of the best C-rarity cards in the game, Leona can last you all the way until the final boss. The utility of her Ability can’t be underestimated. Abilities that can KO upon play break the natural stalemate of each player setting down one character a turn, letting you make direct attacks to the opponent’s HP. Her BP/SP are only average, but they’re enough to pick off a second weakling while building resources. All of her Back-Up options are solid early to midgame cards, too.
Ability:
Upon play, add one Juni and/or one Juli CHA from your deck to your hand.
An all-around great card. Juni and Juli are nothing to write home about on their own; they’re pretty weak characters. But they can Back-Up M. Bison’s already impressive 800 BP for a total value of 1400 BP. That takes two more turns, but you get an excellent +4 SP while becoming nearly as strong as Geese/Zero Akuma, who generate no SP in exchange for 1500 BP. Also, pulling Juni and Juli thins your deck and increases your odds of drawing the cards you want, and lets you draw more cards from Makeover. You can even use them as discard fodder for Rose. Shopping can help you reuse M. Bison’s effect as well, should it ever be useful to. But what really seals the deal is that even without Juni/Juli (i.e., if you draw them before using M. Bison), M. Bison is simply a strong card.
MORRIGAN
700 BP
SP +5
Capcom
Darkstalkers
Ability:
While active, damage inflicted by this card during a direct attack restores an equal amount of HP to its player.
I think Morrigan’s Ability can be overvalued somewhat by some players. Needing to attack directly disincentivizes you from using Unites, which are extremely important, and otherwise requires you to lead attacks with higher-BP CHAs so the opponent counters them while allowing an attack from Morrigan through. Unless you have a full field, you can’t even use a Unite in that scenario without giving up Morrigan’s Ability.
Recovering HP is all well and good, but you don’t need HP if you just… win before it runs out in the first place. Morrigan’s genuinely good statline can help you reach the finish line faster regardless, but it can be met or exceeded by more proactive CHAs like Andy and Sougetsu. More HP doesn’t necessarily get you to victory, but merely delays a potential loss. Andy and Sougetsu directly get you closer to winning, which also decreases the likelihood that a game goes on long enough to where you need more HP. Also, human players can’t be as easily tricked into allowing Morrigan attacks to go through. When choosing between an 800 BP CHA and a 700 BP Morrigan, they’ll obviously counterattack the latter. Morrigan is an excellent card for the entire campaign, but isn’t worth considering for the meta.
NAKORURU
500 BP
SP +3
SNK
Samurai Shodown
Ability:
Upon activation, draw one card.
As odd as it is to say about an effect that reads as powerful, I think Nakoruru is a bit overvalued for being one of the game’s rarest cards. By the time you can obtain her, most manual (square) Abilities are too slow to be worth it, and there are plenty of faster (triangle) Abilities that impact card economy like Sougetsu and Andy. Sure, they affect economy by hindering the opponent rather than supporting you, but that’s worth their superior stats.
If that comparison is too abstract, then consider akira: same BP, gives two more SP, and immediately adds the next AC card in your deck to your hand. You don’t necessarily have a greater likelihood of getting a better card than that from Nakoruru, despite her being slower and weaker. The metagame moves too quickly to have Nakoruru sit there and draw cards for several turns. She’s a good card for the campaign, but good luck even getting her during that time.
NAKORURU (C)
600 BP
SP +4
SNK
Samurai Shodown
Ability:
Upon play, its player recovers 500 HP.
Possibly the only HP-regenerating card that’s worth a damn, Nakoruru’s 500 HP gain is the minimum of what can be considered significant. But what seals the deal is her respectable BP and downright good SP generation. In other words, Nakoruru (C) is good because it’s all-around helpful. She shouldn’t be in an optimal deck—there’re just too many more impactful cards—but she’s definitely good enough to contribute for the entirety of the single-player campaign.
NAKORURU (T)
600 BP
SP +4
SNK
Samurai Shodown
Ability:
While active, at the end of each of your turns, all of your opponent’s Frozen characters receive 200 BP of damage (this can KO).
One of the more interesting passive Abilities in the game. 200 BP might not seem like much, but it can punish your opponent for trying to block high-BP attacks with near-death characters. In a best-case scenario, Nakoruru (T) has at least 1200 BP’s worth of value paired with her always great SP generation. Her Ability works the turn she’s played, so you can completely blindside opponents. And of course, you can also choose to have her sit on your field for a few turns, if the situation calls for it.
PYRON
800 BP
SP +2
Capcom
Darkstalkers
Ability:
If your SP is lower than your opponent’s at the end of your turn, you gain 3 SP. Always active. This Ability can stack up to three times and triggers simultaneously. If there is only 1 SP of difference between you and your opponent, you will still earn 3-9 SP. To clarify, this Ability doesn’t trigger if the two players’ SP are equal.
Pyron is an amazing card that rewards you for being aggressive with your SP usage, which you’re already incentivized to do for Unites and Action cards. By keeping him on the field long-term, you can overwhelm your opponent’s own SP economy. His BP is also respectable, and once it gets low, you can avoid your opponent counterattacking Pyron by hiding it behind Unites. This earns you the chip damage Pyron would’ve gotten from attacking separately while ensuring Pyron’s safety and your SP is lower than your opponent’s.
Q-BEE
600 BP
SP +3
Capcom
Darkstalkers
Ability:
Upon play, add any number Q-Bee cards in your deck to your hand. The deck is then shuffled.
A very interesting Ability. 600 BP/+3 SP is only a decent statline on its own, but Q-Bee can Back-Up herself for a potential of 1200 BP over three turns. It might not seem worth the wait, but Q-Bee’s true value is in boosting your card economy. She thins your deck so you can more easily predict your draws, and she can provide more draws from Makeover. Even without using Back-Up, it can be worth the security of having a CHA to play every turn. Open a game with five AC cards and one Q-Bee? No problem! That’s enough to have full CHA zones in three turns. While not as individually strong as M. Bison, Q-Bee makes up for it by requiring less deck space (three cards instead of three to five) and being stronger than Juli and Juni. You also don’t waste a “draw” like you can with Juli and Juni.
Ability:
Upon activation, all CHAs currently in the Ring receive 200 damage, including Roll.
Well, Roll is certainly much better in Card Fighters than she is in Marvel vs. Capcom, but she’s still hardly a meta contender. Regardless, she’s quite good if you’re lucky enough to obtain her in the early game. Even though she damages herself, Roll can clear the opponent’s Ring of low-BP stragglers that may defend their HP.
Her self-destruction can even be a blessing on occasion, as it may prevent her from clogging up your Ring. You can keep her around for a bit longer depending on how useful you find her, and if you’ve collected any copies of Mega Man, a decent card with Back-Up compatibility. Man, that 0 SP generation is super uncalled for, though.
Ability:
Upon play, player must draw four cards then discard three cards from their (entire) hand.
For a B-rarity card, Rose’s Ability is completely insane. Going four cards into your deck is enough for her to eclipse every other draw-based CHA Ability. Her ridiculous SP gain also matches or exceeds her competitors, and allows the player to immediately use cards like Lucky Kitty to gain even more cards. The discard “cost” is practically a joke. Simply discard the least valuable cards in your hand, and you’ll have a stronger hand than from before you played Rose every time. The fact you get one more card than what you discard is just hilarious. Even Rose’s BP is decent. Ludicrously good card; consider running three copies of her in anything. You’ll never have trouble getting what you need again.
Ability:
Upon play, both players must discard all Action cards in their hand.
Well, that’s quite extreme. Sagat can potentially nuke an opponent’s entire hand, and whether he does or doesn’t, his stats are exceptionally high. The power of this card is beyond question, though its double-edged nature warrants consideration. In my experience, an optimal deck can run enough Action cards that Sagat is heavily encouraged to stay in the hand, which isn’t helpful. Best Shot/Lucky Kitty/Psyche Up alone take up about a fifth of one’s deck. Also, most AI opponents don’t run that many AC cards, so Sagat might not earn his keep relative to his risk. Against human decks, though? He’s a beast.
SAKI
600 BP
SP +2
Capcom
Quiz Seven Color Dreams
Ability:
When played, choose one character card in your deck to place on top of your deck.
Given that the most powerful and varied effects in Card Fighters broadly come from character cards, Saki’s usefulness only grows as you acquire cards. While her searching effect is somewhat slow—you can generally only use what you searched on your next turn, even with draw power—being able to grab exactly what you need for any situation undeniably overcomes that handicap. Topping things off, Saki has an acceptable BP and SP+2, which is good for tempo. That all said, Saki is mostly power-crept by Rose. Rose draws so many cards that you can usually work with not necessarily getting what you want, she doesn’t use your next draw phase, and she gives 3 more SP.
SHIKI (T)
600 BP
SP +5
SNK
Samurai Shodown
Ability:
While active, both players must pay an additional 3 SP to activate Action cards. This cost increase stacks with multiple Shiki (T).
An intriguing counter to Action card-heavy decks, which I expect would be the bulk of the meta. Many of the best Action cards are also the cheapest, and Shiki (T) puts a damper on one’s ability to combo-off in a single turn. It can obviously work against you, but you can attempt to exhaust your Action cards before playing Shiki (T) and just rely on characters while your opponent desperately tries to KO it. Since you can choose to never have Shiki (T) battle, your biggest concern should be KO Abilities like Akuma and Wild Iori. By combining Shiki (T) with Guile, you can create a pretty effective lockdown. Shiki (T)’s great stats and stun effect make her an effective first-turn play.
SOUGETSU
700 BP
SP +3
SNK
Samurai Shodown
Ability:
Upon play, opponent won’t draw a card at the start of their next turn.
An excellent card and one of the most versatile characters in Card Fighters. Slowing down your opponent’s card economy is universally valuable, as is his 700 BP and +3 SP. 3 SP is enough to play Lucky Kitty, immediately causing a difference of two in card economy. Devastating! Sougetsu’s only flaw is that he’s far more valuable than his Back-Ups, so don’t expect anything from that in an optimized deck.
WILD IORI
1000 BP
SP +0
SNK
The King of Fighters
Ability:
Upon play, KO one character with 800 or more BP. If there are no other viable targets, Wild Iori must KO himself.
With 200 more BP, Wild Iori may seem like a linear upgrade to Akuma, but it really depends on your opponent’s deck makeup. Plenty of characters with good Abilities fall under 800 BP, though there are certainly many who broach it, as well. In any case, it’s advisable to use both Wild Iori and Akuma, since the field advantage their Abilities generates is maybe the most critical element of the entire metagame.
Action (AC) Cards
Best Shot (1 SP)
Effect: Look at the top three cards of your deck and pick one to add to your hand. The remaining two are discarded.
I think one could argue that Best Shot is also the “best card” in Card Fighters. It’s extremely common and thus easy to obtain, costs almost nothing to play, and works in every single deck. Basically, for 1 SP, Best Shot “transforms” itself into one of three possible cards in your deck. Once your deck is full of valuable cards, you’ll almost certainly grab something relevant to your situation. By digging deeper into your deck, you can also more accurately predict your subsequent draws. Best Shot may not search your entire deck, but it’s the closest card to doing that. Always play three Best Shot, no questions asked.
Heritage (0 SP)
Effect: Selectively KO any number of your active characters (minimum one) and draw one card for each.
Far better than it might seem. One of the most common restrictions to generating resources is your field becoming cluttered, and Heritage solves that issue while thinning your deck. Notably, it costs 0 SP, saving you the 5+ SP needed to remove some characters by “force” via Pair-Up attacks. Because it’s not a character Ability, by using it at the start of your turn you can potentially replace a KO’d character right away for no lost field presence, and you can continue a nearly full-power offense. If you use an Ability to do something similar, you can only have at most one remaining character to attack with. Run at least one Heritage to search out with Management if your field becomes locked down.
Lucky Kitty (3 SP)
Effect: Draw two cards.
Well, it doesn’t get much simpler than this, does it? Considering the card you would have played instead of Lucky Kitty, the odds of drawing into something you need are doubled for a meager 3 SP. With Psyche Up! or other methods of gaining more than 3 SP in your deck, you can even profit in all resources and perform combo plays. Always play three Lucky Kitty, no questions asked.
Makeover (2 SP)
Effect: Your hand is added to your deck, which is then shuffled, and you draw cards equal to the amount in your hand when Makeover was used plus one additional card.
Pretty outrageous effect. The bigger your hand is, the more likely you are of getting exactly what you want from using Makeover. It’s great for ensuring you see cards like Best Shot, Lucky Kitty Psyche Up!, Stifler, and so on. Makeover is a large part of why combo decks in Card Fighters work, and you can do insane plays with it in a single turn.
Management (1 SP)
Effect: Select one Action card from your deck, shuffle your deck, then place that card on top of your deck.
For waiting one turn and using 1 SP, you can seek out any Action card of your choice. Once you have cards like Best Shot and Lucky Kitty, I’d consider Management just as essential. Those two alone are likely better draws than most of your deck, and Management guarantees seeing them. Being the first player to gain in card economy is extremely important and allows one to snowball their opponent. Once you have enough quality Action cards, I’d recommend running three Management.
No Tricks! (2 SP)
Effect: Removes all Action cards from your deck only.
Pay 2 SP to sabotage yourself? Not quite. No Tricks! is an extremely unusual card. Its actual value is from thinning your deck in order to almost completely control your draws. As an extreme example, if you build a deck with No Tricks! and 48 other Action cards and use it, you then know exactly what card you’ll draw on your next turn; there’d be only one left, after all. Decks using No Tricks! should be built entirely around it. Prioritize immediately usable Action cards like Psyche Up!, Best Shot, Lucky Kitty, and Stifler, activate No Tricks, and steamroll your opponent with a consistent onslaught of the game’s most aggressive character cards. Very high risk but potentially equally high reward.
Psyche Up! (0 SP)
Effect: Gain 5 SP.
Maybe it does get simpler than Lucky Kitty. The only real “cost” of Psyche Up! is using up the card itself, but that can be recouped through Lucky Kitty. The more abstract ways of benefitting like the damage done from pair-ups or advantage from other Action cards just make Psyche Up! even better. I think this is another card you should always play at a minimum of two copies.
Shopping (Costs 3 SP)
Effect: Shuffle up to three discarded cards back into your deck then draw one card. You can choose to shuffle no cards back, in which case you’ll simply draw one card.
Boy, I don’t know what SNK was thinking by attaching the draw effect. Getting to recycle your strongest cards and stack your draws in your favor is already good enough, but the fact you only lose SP from using Shopping instead of an entire card is ridiculous. If you repeatedly shuffle one copy of Shopping back every time, you can become nigh immune to decking out, eliminating one of the only downsides to filling your deck with draw/search effects. To leave room for those, you may want to consider only running two Shopping. Psyche Up! and Lucky Kitty are great general targets for Shopping.
Stifler (Costs 3 SP)
Effect: Look at the opponent’s hand and discard one card of your choice.
It’s obvious why the discard effect is good; you can put your opponent on their backfoot by increasing the odds that they have no cards that counter your own. Taking this to the next level is the added benefit of seeing your opponent’s entire hand. Seriously, that effect on its own would be pretty strong. Stifler can be played at three copies in any deck, and its cost is met by several of the best first-turn CHA Abilities in the game like Sougetsu and Andy. You do not want to be the first player to be hit by Stifler.
Tri-Quiz (Costs 5 SP)
Effect: Choose to inflict 300 damage to enemy HP, gain 500 HP, or have all of your active characters gain 200 BP.
I think Tri-Quiz is a bit overvalued by the game itself and some players. It’s by no means a bad card, but there’s no shortage of effects more powerful than anything it offers, making it difficult to justify deck space for Tri-Quiz. The first two effects can be done by playing certain characters with matching Abilities, and that has the added benefit of building your field presence while not making you expend a card. Potentially 600 extra BP can help you push for a same-turn win, but Tri-Quiz’s cost cuts into SP you may want for pair-up attacks to pierce your opponent’s defenses. You also don’t necessarily want all of your characters to stay on the field too long, because that prevents you from playing new ones for more SP or triggering Abilities.
SNK and Capcom Version Differences
To summarize, the two games are almost exactly the same; more so than even two Pokémon versions. Your starting deck changes to include more characters from your version’s “faction,” but there are no restrictions on your deck regarding SNK or Capcom characters. You can mix them to your heart’s content. The only advantage to favoring one side over the other is an increased likelihood of compatible Back-Up combinations, which is pretty minor (if it even comes up at all). In my opinion, SNK Version has the better starting deck, while Capcom has the better exclusive cards.
Version-Exclusive Cards
Each version has five exclusive cards that must be traded to the opposite copy to achieve a complete Card Album. They are as follows.
SNK: Blue Mary / Geese / Mr. Karate / Maxima / Shiki (C)
Capcom: akira / Alex / Karin / Mech Zangief / Red Arremer
Without question, Capcom Version has the better exclusives. Most exclusives from each side are merely decent midgame cards that one wouldn’t include in an optimized deck. The exception for SNK is Geese, though I think Blue Mary is close to being meta-viable and certainly good enough for single-player. Capcom’s akira and Mech Zangief could go in any optimized deck, with akira having an exceptionally good, unique Ability. Also, the stats of Geese and Mech Zangief are duplicated on cards obtainable in either version (Zero Akuma and Krauser), so the advantage of trading is mostly getting higher average character stats in one deck as opposed to opening up new strategies. Blue Mary and akira represent the latter. Geese and Mech Zangief can be obtained once by progressing through the story, then infinitely as a random reward from defeating Mask in the post-game (but still only in the relevant version).
Card Location Changes
In the post-game, Mask rewards a one-time prize card for defeating him 10 and 30 times. The SNK Version hands out Orochi and Lucifer, respectively, while Capcom gives the same cards but in the opposite order. For what it’s worth, I consider Orochi superior to Lucifer.
Trade Machine Secrets & Exclusives
Akari (P) and Jin Saotome can only be obtained as random prizes from a Trade Machine, which otherwise give out cards found in other locations. Prepare for a lot of resetting or a lot of lost cards, especially if you want multiple copies of each. Both cards are in both versions.
Versus Exhibition Exclusives
The winner of an Exhibition match in Versus mode receives one random card, and the cards Chizuru and Tessa are exclusive to this method. Neither are particularly good cards, though Tessa is better than Chizuru. If playing on Neo Geo Pocket Collection Vol. 2, make sure to win the match with the player that started the Link process. The other loaded file can’t be resumed after disconnecting, which means its rewards can’t be saved.
Trading Secrets
Two cards can be obtained via special means while trading, but only one of them is exclusive to this method. The exclusive card is Akari while the other is Zero Akuma. If Akari (S) and Akuma are traded simultaneously, the Akari (S) becomes Akari while the Akuma becomes Zero Akuma. Yes, you lose the original card by doing this. Both secret cards are worse than the cards you give up for them, so you may want to do this only once just to add Akari to your Card Album.
How Back-Ups Work
Compatible character cards can be chosen for Back-Up, wherein a character on the field gains an additional 300 BP by using a character in the hand. Since there are only three character zones and only one character can be played per turn, Back-Ups are a way to get value out of characters that may never get a chance to hit the field.
Characters providing Back-Up are virtually underlaid beneath the active character; they do not immediately go in the discard pile. If a character receiving Back-Up is removed from the field in any way, their Back-Up is sent to the discard pile. Keep all of this in mind if you’re looking to recoup Back-Up cards using effects that recover cards from the discard pile.
Back-Up is a decent mechanic early to midgame, but eventually, you’ll have a variety of effects far more powerful than a paltry +300 BP, and Back-Ups become a thing rarely worth considering when building a deck. It’s very uncommon that top-tier cards have Back-Up compatibility.
100% Back-Up Completion
Card Fighters records which character combinations you’ve used for Back-Up. Previously used combos will be marked with a star icon in the card’s Data page, while a filled-in circle represents a card’s currently active Back-Ups. If you’re looking for something to do, make every Back-Up in the game! There’s no reward beyond those star marks, however.
Looking at some characters, you may notice that they have Back-Ups listed as “???.” This means that character receives Back-Up from cards of the opposite faction. Vega (AKA Claw/Balrog), a Capcom character, has three ??? Back-Ups listed, meaning there’s three SNK characters that can back them up. You have to discover these yourself through trial and error. Or use a guide, of course. The connections are usually fairly obvious. Try pairing characters with things they like, such as animals, or similarities like fighting style, weapons, or even appearance. Once hidden combinations are found, they’re permanently recorded in the Data page, giving a more practical reason to be thorough with Back-Ups.
My (Best?) Deck: Hand Grinder
Edit: I’ve updated this deck since posting it and have yet to change my list below.
This is my favorite deck, and I think it’s pretty good. I came up with it myself, but I doubt I’m the first to use this strategy. Basically, the goal is to make your opponent discard their entire hand as early as possible, leaving them without any cards to counter your own. They’ll be unable to keep Fighters on the field for more than one turn, making your victory inevitable as you attack with a full field.
SNK:
- Andy x3
- Billy x2
- Krauser x3
- Haohmaru x3
- Sougetsu x3
- Yashiro x3
CAPCOM:
- M. Bison x3
- Akuma x3
- Rose x3
- Juni x1
- Juli x1
- akira x3
ACTION:
- Psyche Up! x3
- Best Shot x3
- Lucky Kitty x3
- Stifler x3
- Makeover x2
- Management x3
- Shopping x2
Psyche Up! allows you to use multiple Action cards immediately, letting you play draw power like Best Shot, Lucky Kitty, and Makeover. Management and Shopping help you stack your draws favorably, with the latter letting you recycle your most broken cards like Stifler.
Get to and play Stifler immediately, if you can. This lets you view your opponent’s hand and discard one card of your choice. If they have any Action cards, play Billy. If you can’t get to Stifler, Billy is ideally played turn one as your opponent is more likely to preserve Action cards early on. M. Bison is good early play thanks to his +4 SP and deck thinning from searching Juni and Juli, making it easier to draw important cards. If you draw Juni and Juli too early, Makeover can shuffle them back into the deck. Rose and akira are additional draw power.
In addition to Stifler, Andy and Sougetsu are extremely important. Andy is another free discard on top of having high BP, while Sougetsu prevents the opponent from drawing a card next turn, making their resources dry up even quicker. Yashiro can return your Fighters to the hand as well as the opponent’s, which can let you reuse Andy and Sougetu’s Abilities.
There’s a few heavy-hitters in the deck to hasten victory and deal with aggressive opponents if you can’t end the game fast enough. Krauser has an incredible 1200 BP and +5 SP, letting you defend your HP while getting SP for Action cards. If that’s not enough, he can also be Supported by Billy if needed. Haohmaru has high BP while being able to deal chip damage to opponents trying to stall you out. Akuma is very versatile; not only is he able to KO one Fighter regardless of their BP, he can even select one of your own to help clear your field while increasing your total on-field BP.
Counterplay
Use the same deck and go first. Just kidding. Sort of. AI decks may be fundamentally incapable of winning against this deck. I haven’t lost once against the computer when using it. Its biggest weakness is your field being clogged up with (probably) weakened Fighters, preventing you from using your many important Abilities.
The AI isn’t smart enough to intentionally leave your weakened Fighters alive with minimum BP, but humans might be. Yashiro and Akuma have the obvious flaw of needing an open space to be played, so if you draw them too late, you can be cornered. There are countless cards you could supplement to deal with these situations. School’s Out and Nothingness are just two examples, and they’re both Action cards that can be searched out with Management. You shouldn’t need more than one or two cards for this purpose. The reason I don’t include them in my above list is because they’re unnecessary for the AI and are therefore potentially useless when drawn. Ideally, every card is usable in the greatest number of game states possible.
Another tactic that’s useful for the AI, and to a lesser extent human players, is Unite attacks. You should have a surplus of SP, as many of these Fighters have good SP gain alongside their utilities. Spending that SP on Unite attacks coerces the opponent (forces, in the AI’s case) to defend against them, potentially KOing two or more of your Fighters at once and freeing up your field. If a human opponent doesn’t take the bait, they still have to deal with the chip damage to their HP. If they’re deliberately sparing your Fighters, then it’s not likely they would’ve pushed for your HP during their next turn and given you the chance to suicide via counterattack. Keep an eye on your opponent’s total BP when Uniting, because you’ll have at most one Fighter capable of defending your HP on their next turn.
There are plenty of other tech options worth considering for this strategy. A big one is Saki, as she searches Character cards like Andy or Sougetsu. I currently cut her because I found her too slow, but I might reconsider.
Incorrect / Ambiguous Card Descriptions
The English localization of Card Fighters leaves much to be desired. General awkwardness aside, some card descriptions are downright wrong. As I notice them, here is what those cards actually do.
Athena (600 BP / SP +3) [SNK]
Athena’s Ability causes her to deal 600 HP’s worth of damage upon a direct attack regardless of her current BP. Whether she’s currently stronger or weaker, she will always inflict exactly 600 points.
B.B. Hood (500 BP / SP+3) [Capcom]
B.B. Hood does not KO all characters like her description says. Instead, she shuffles herself back into the deck in exchange for KOing one enemy character of your choice.
Haggar (700 BP / SP+3) [SNK]
Haggar’s Ability reads similarly to other cards that return discarded cards to the deck. In actuality, Haggar shuffles characters from the entire field—both sides—essentially making him a tactical “nuke.”
Haohmaru (1000 BP / SP+1) [SNK]
If Haohmaru attacks a character with less BP than his own, the difference is inflicted to the opponent’s HP. It works exactly like Pair-Up attacks or damage calculation in Yu-Gi-Oh!. This effect is not applied during counterattacks despite what the card’s description states.
Glitches / Bugs / Oversights
Pyron
There are circumstances where Pyron’s Ability to raise your SP will not activate when it ought to. As far as I can tell, this happens when a player controlling Pyron KOs an enemy character during battle. Direct attacks and battles where the enemy survives will have Pyron work normally. I suspect the programming protocol for KOs takes priority over anything else, and the game is told to end the turn immediately after its conclusion, so it skips the check for Pyron’s Ability. I’m not sure if this affects other end-of-turn Abilities.


Leave a Reply