







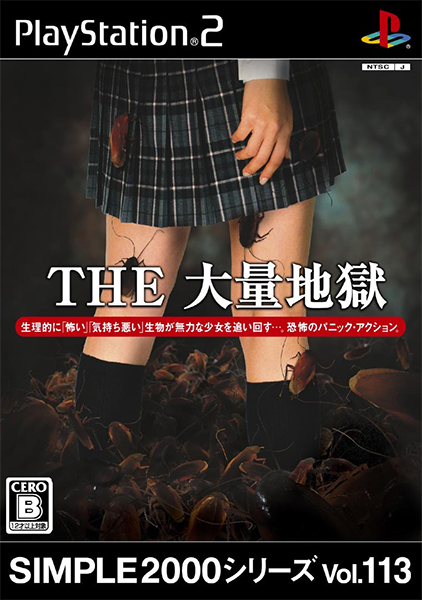
There’s not much information when it comes to The Overwhelming Hell, AKA The Tairyou Jigoku, so I guess it’s up to me. This is a spoiler-free guide primarily meant to share things players may want to know before starting the game. If you’d like me to cover something not detailed here, please leave a comment.
Control inputs assume the default button layout on a DualShock controller.
Movement
- You can run, but this consumes your stamina meter. If your stamina meter empties completely, you’ll come to a forced stop to catch your breath. This means that you should always lift up on the run button before the meter expires, because even walking is far less dangerous than a full stop. Your meter recovers while not running.
- By mashing L2, you can make short “skips” that are faster than your walking speed, but don’t consume stamina. It’s not strictly necessary to exploit this, but it’s worth keeping in mind.
- Using the circle button to jump, it’s possible to clear small heights and create shortcuts. It’s incredibly inconsistent which terrain has invisible walls that prevent you from jumping over it. You’ll have to experiment.
- Holding L1 allows you to strafe, i.e., move left and right without changing your facing. This is most helpful when trying to aim attacks.
- Pressing square has you crouch. The proximity required for enemies to notice you increases while crouching, so it’s generally the safest way to move around.
Attacking
- Your attack’s hitbox varies based on the weapon type you have equipped. A bat is swung right to left around the character’s shoulders, while a broom, is swung vertically in front of you. Crouching (square) also changes your attack, and this is sometimes necessary to hit enemies on the ground with specific weapon types. Use weapons that naturally swing where enemies are at, or you’re practically wasting your time.
- Jumping (circle) is an extremely useful attack. It has no durability, unlike weapons. It’s possible to bait enemies with jumps by alerting them to your presence, then standing in place and jumping as they walk under your feet. Jumping while running is also a good way to initially engage groups of enemies you can’t avoid.
- Pressing R1 near an immobilized enemy allows you to pick it up. Pressing R1 again throws it as a projectile. You can also throw while jumping (circle) for greater distance. This is extremely important, as you can’t beat the game without using this technique.
- Attacking makes noise, so expect anything close by to become aware of you.
Weapons & Items
- Weapons break after enough uses, but I wouldn’t stress too much about running out of them. I played on Hard mode and still had a surplus by the end of the game after thinking I had to conserve weapons more than I really needed to. There are tons of weapons lying around stages, so keep an eye out and pick all of them up. Don’t go crazy trying to fight every single enemy or anything, but if you can’t get past foes without them noticing you, just clobber them instead of hoping for good luck.
- Specialized weapons like the Bug Zapper follow logic you might expect. The Bug Zapper is useless against non-bugs. That’s just one example.
- Consumable items that lower Erika’s accumulated panic “meter” appear to be unusable on Hard mode.
Enemies
- Enemy types have different behavior patterns. Some notice Erika more easily than others, and under different circumstances. Experiment and be observant.
- Enemies can be shaken off by rotating the left analog stick.
- How difficult it is to shake enemies off also seems dependent on the enemy type.
- Enemies cannot be permanently killed. After a certain amount of time, they’ll get back up and pursue you, if you’re still in range. Don’t dawdle.
Quality-of-Life / Interface Tips
- You can only save when entering or leaving a stage.
- Dying is very inconsequential. You can continue an infinite amount of times from your last screen transition, in the same state you were in upon transitioning.
- Take advantage of this. If you waste resources in one room or things otherwise go poorly, allow for a game over and try again.
- Create “checkpoints” by regularly entering new rooms and causing a screen transition, even if you don’t necessarily intend to go down that route. If get a key, for instance, go through the nearest screen transition so that you won’t lose the key if you game over.
- If you choose not to continue after a game over, you’ll go a stage select screen that allows you to begin from any previous room you’ve been to, with the exception of Erika’s school. You can game over intentionally to “warp” around this way, which is extremely useful. Of course, you can also explore previous areas to grab items and weapons, if you think you’ve missed any.
The White Rabbit
- Finding and catching the White Rabbit is necessary to complete areas.
- You can locate the Rabbit by listening to the obnoxious ringtone of Erika’s phone. Even easier, you can just enter a screen, press R1 to open your map, and look for a red dot marker. That’s the Rabbit. If you don’t see a dot, go to a different screen.
- Pressing triangle once Erika is close enough to the Rabbit has you dive towards him. Provided nothing is obstructing your path, the dive automatically orients you and reliably tracks the Rabbit’s position. You’re usually safe to dive at the first opportunity.
- If the Rabbit notices you, he’ll run away. You’ll have a short time to capture him, but he’ll quickly disappear. If he does, he’ll reappear in one of several, fixed locations. Crouch by pressing the square button to get closer to the Rabbit without him noticing you. His awareness seems pretty low, however. I’ve seen him ignore Erika while looking directly at her, and at times, I’ve run straight towards him, dived immediately, and caught him.
- When the rabbit is caught, he tends to drop an item. This has the chance to be a consumable item, but more importantly, a key item. If he drops a consumable, just keep catching him until he gives you what you need. Once you get the final required item, the Rabbit will stop spawning in that area.
- Based on my limited testing, I’ve noticed a few things:
The Rabbit’s location is saved upon making a screen transition checkpoint. If you fail to catch him, you can intentionally game over and try again.
Reloading your save file seems to change the rabbit’s location, so if you’re patient, you can keep reloading until he appears at one of his fixed locations that’s closest to your spawn point.
Which item the Rabbit drops might be related to where he spawns. Certain locations could guarantee a consumable, and likewise for the key item. If you keep getting the same result, try a different location.
Any of these assumptions could be wrong, so please let me know if any don’t seem right to you.
Ending Requirements
The game always ends at the same place, and there are three different endings available based on how you play. All endings reference the number of White Rabbit letters you’ve collected throughout each area, as well as the total number of enemies thrown by Erika (press R1 to pick up and throw). You do not need to collect all Rabbit letters for the best ending; you have some leeway.
For those who wish to know, here are the precise requirements according to online sources:
Bad ending
- Have a play time of at least three hours.
- Collect under 16 letters.
- Throw less than 50 enemies.
Normal ending
- Collect at least 16 letters.
- Throw less than 50 enemies.
OR
- Collect under 16 letters.
- Throw at least 50 enemies.
Basically, you need to fulfill one, but not both, conditions for the good ending.
Good ending
- Collect at least 16 letters.
- Throw at least 50 enemies.
It’s possible to see multiple endings on a single playthrough by reloading previous save files. If you save after clearing a benchmark, you might lock yourself out of getting a worse ending, so keeping multiple saves is recommended. Also, do not overwrite your final save file. Reloading a cleared game save prompts you to start a new game. Of course, if you don’t care about seeing every ending on one playthrough, this doesn’t matter.
The only way to see how many enemies you’ve thrown is by finishing the game, whereupon the game tells you. Tedious as it is, you’ll have to do at least some manual counting. Yes, depending on the ending you want, you may have to reload your save file and literally “grind” enemy throws. I had to do this.
If you missed Rabbit letters, use the aforementioned stage select “trick” to go back and pick them up.
New Game+ / Unlockables
You can get bonuses like new outfits and audio clip sets (“accents”) for Erika depending on which ending you receive for the difficulty you’re playing. Unlockables do not save to system data—they’re tied to a specific save file. In other words, to get every outfit and accent on one file, you’ll have to beat the game from the beginning many times. Beating the game on hard mode with the best ending will not unlock everything from a lower difficulty/worse ending.
Any previously unlocked features can be selected upon loading a cleared game save, which prompts you to choose your settings before starting the game over. A completely new save file will always have nothing unlocked.
From all of us at bug control, we wish you godspeed.
Leave a Reply